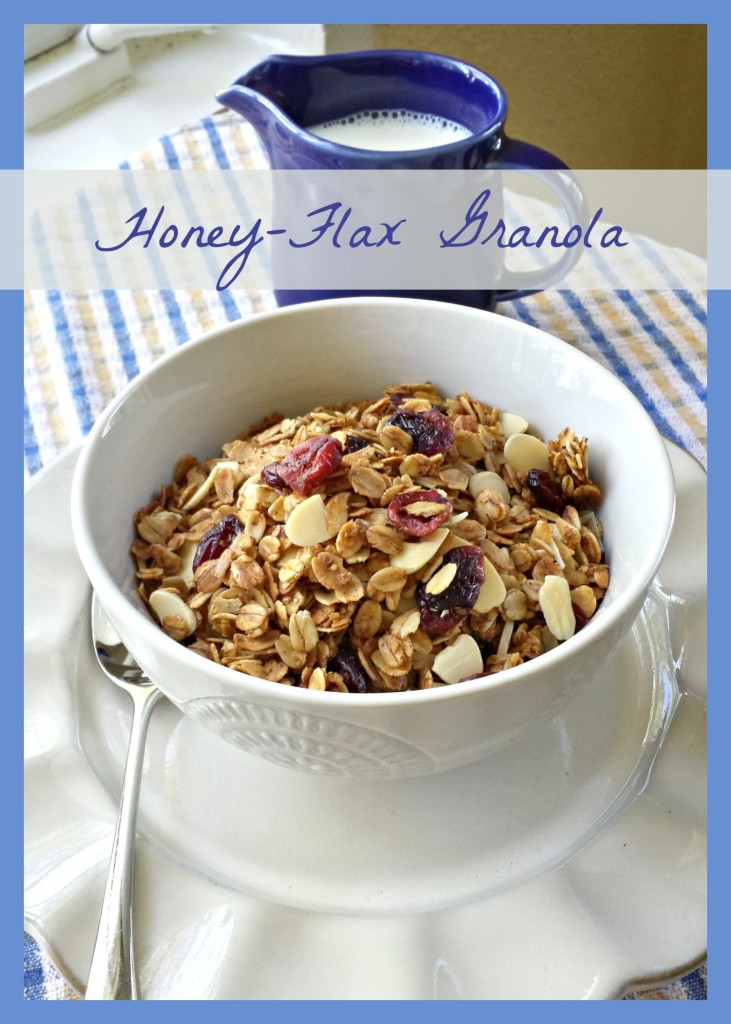
My Best Recipe: Honey-Flax Granola

Honey-Flax GranolaMy Best Recipe is definitely becoming a series! If you haven’t read my original post, the idea of a “best recipe” is one that is consistent, uses just a handful of staple ingredients, is easy to remember, and comes together with a minimum of fuss. This granola recipe fits nearly all those requirements, but it does take a bit of attention to make sure it doesn’t go from toasted to roasted while you weren’t watching.

As I mentioned yesterday, when I first started making this recipe it was kosher for Passover, made with matzo farfel, which is essentially rolled oat-sized bits of matzo. The original recipe came from Streit’s Matzos, and it’s terrifically flexible for Passover and any time of year. For the record, the other recipes on the Streit’s site look a bit…odd, but the mandel bread recipe is gold standard.

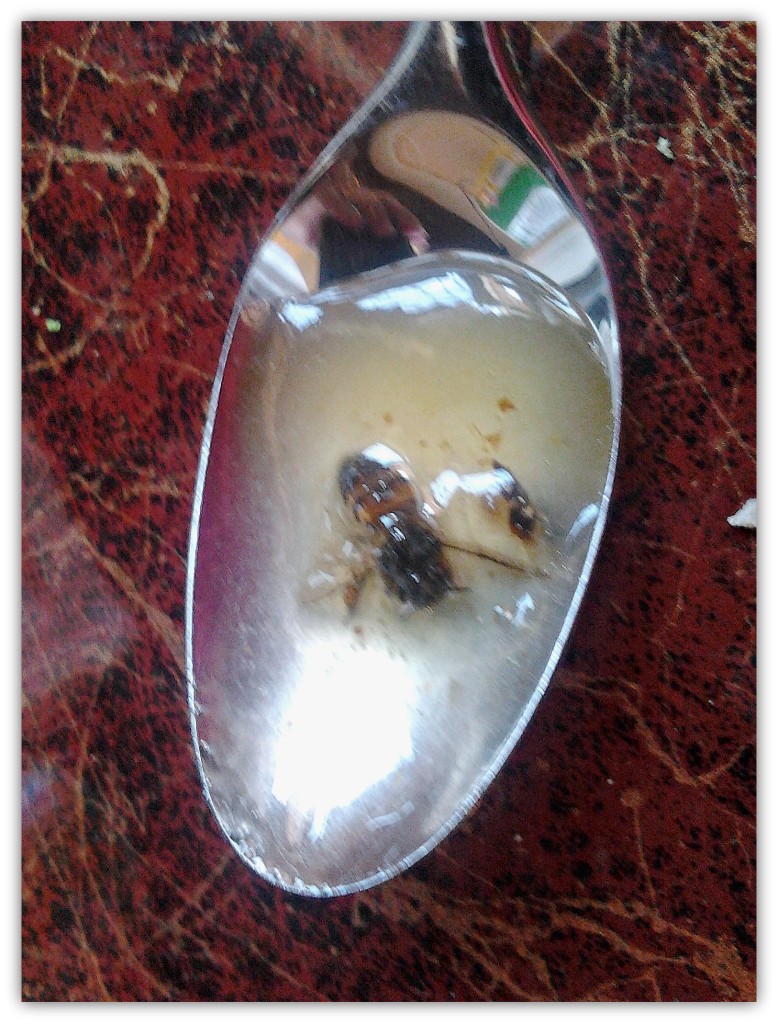
Once I started making granola on a regular basis in Uzbekistan, I became a frequent customer on the honey aisle in our local bazar. Vendors there had honeys collected from various parts of Uzbekistan and other countries in the region. Last year I had the great fortune to visit a beekeeper’s association in the Ferghana Valley where I purchased a liter of honey directly from the beekeeper and found this little guy when I opened the jar:

Bee spoon

I haven’t encountered any stowaways in my local Good Flow honey yet, but there’s a first time for everything!

This recipe is what I’d call a base recipe–it’s one you can build on and modify with any mix-ins you like. To prevent any nuts and dried fruits from burning I add them all at the end, after the granola comes out of the oven. It’s hard to say how many servings this makes–that all depends on how many mix-ins you add to the base recipe.

Finally, I’ve recently started making the granola with coconut oil. I haven’t tried a blend of oils, but I suspect it would work pretty well. My only hesitation in using 100% coconut oil is the expense, but it is super delicious and so far it’s been worth it. If you’re gluten-free and can eat oats, just be certain to use certified gluten-free oats.

Honey-Flax Granola

6 cups rolled oats
1/2 cup oil
1/2 cup honey
1/4 cup ground flax meal
Ground cinnamon and ginger to taste
Pinch salt
Mix-ins of your choice (I usually add about 1 cup total of nuts and fruits, and toasted seeds and coconut would work well)

Preheat the oven to 350 degrees. Line a half-sheet pan or two cookie sheets with sides with foil or a silicone baking mat. Spread the oats evenly over the baking sheet. Bake for 15 to 20 minutes until lightly toasted, stirring 2-3 times while baking. Remove oats from oven and reduce heat to 325 degrees.

Combine oil and honey and heat until bubbly. Carefully pour oats into a large, heat-resistant mixing bowl, reserving baking sheets. Pour oil/honey mixture over the oats and mix until the oil and honey are absorbed. Add the flax meal, salt, and a generous sprinkle of cinnamon and/or ginger. Stir to combine and taste to adjust seasoning. Return the mixture to the reserved baking sheets.

Continue baking at 325 degrees for 15-20 minutes longer. Remember to stir every 5-7 minutes to prevent uneven baking, taking care to make sure the edges don’t burn. When nicely toasted, place in a large bowl and the mix-ins. Let the mixture cool and then store in an airtight container.

NOTE: This recipe will go from just perfect to overdone in a flash. Be very vigilant in the last 5-7 minutes of baking to make sure it doesn’t burn.

Honey-Pecan Granola

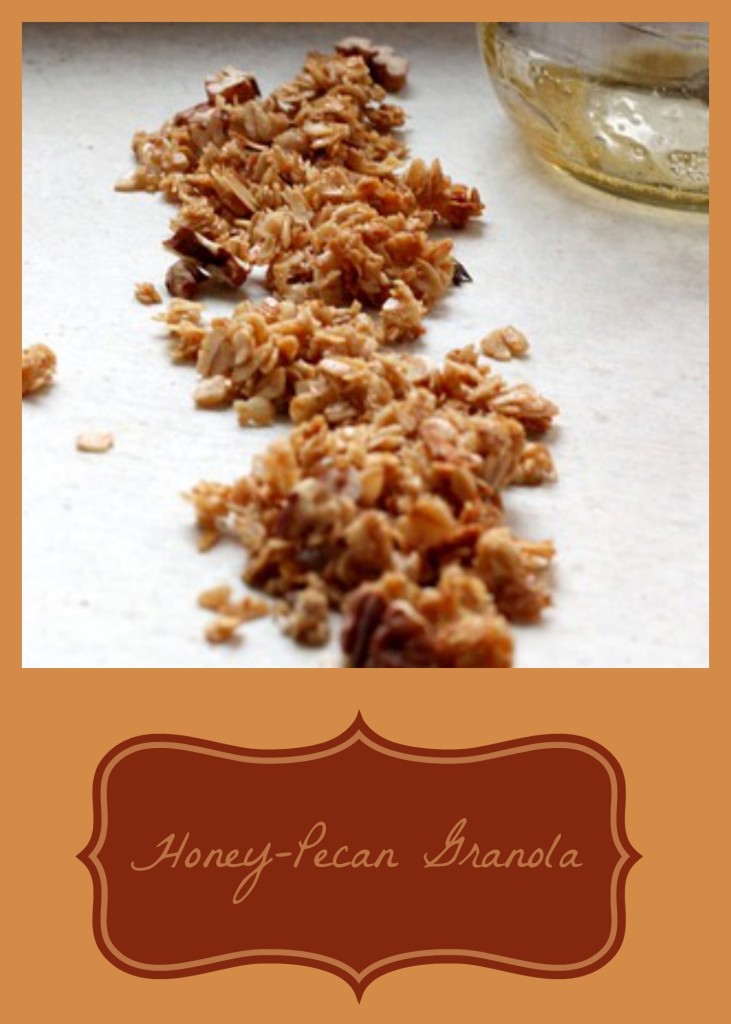
Honey Pecan granolaOr honey-almond granola. Or honey-coconut granola. Or honey-cranberry granola. Or honey-flax granola. Basically, you can add almost anything (and everything) you like and this granola is divine.

I won’t post the recipe right now, but I’ll add it in the next few days, so you’ll just have to come back.

I made this granola all the time while we were in Uzbekistan because the ingredients were plentiful and relatively affordable. While pecans aren’t locally available there, walnuts, almonds, and pistachios are widely available (though pricey), and they frequently found their way into the mix. Dried apricots, too, were common additions. And the honey. Oh, the honey. More on that to come.

When I originally found this recipe I was looking for a Passover-friendly granola recipe since most breakfast cereals aren’t permitted during the holiday. For several years I only made it at Passover, and then one day I realized I could make an everyday granola using the same principles and ratios.

More to come when I post the recipe, but my current mix involves gluten-free oats, coconut oil, toasted slivered almonds, dried cranberries, local honey, and flax seed. We just picked up a giant bag of pecans, so I’m already concocting the next combination in my head. You can trust it won’t be pumpkin spice.

Cookie Bites (Part 2)

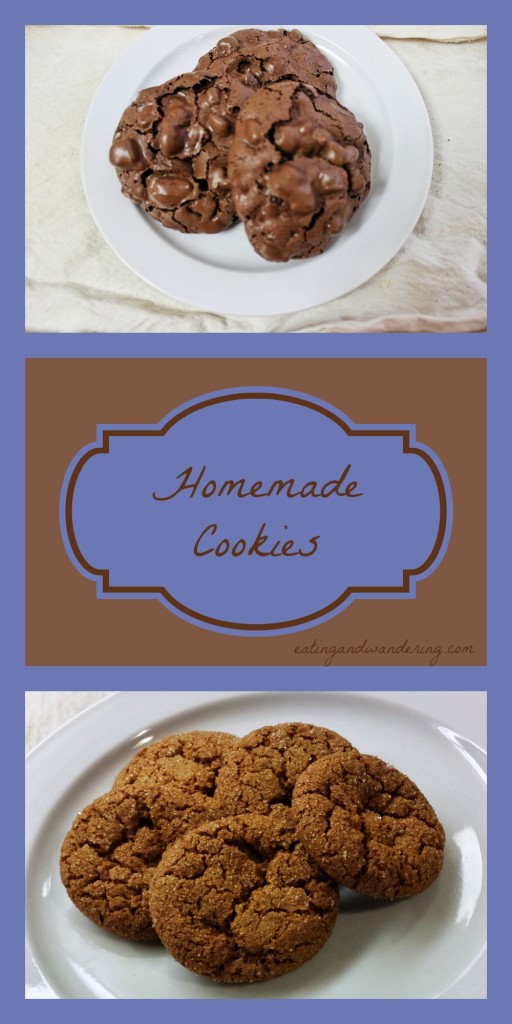
Cookie CollageToday’s cookie recipe was given to me by a baker friend who took pity on my total lack of gingersnaps while we were living in Uzbekistan (pictured bottom right). Most of the key ingredients for gingersnaps are easily available there, with the exception of molasses, and fortunately we squirreled a couple bottles away when we headed overseas so we could make a few of our favorites.

I love ginger cookies of all sorts. Commercially, Trader Joe’s Triple Ginger Snaps and the old-school Mi-Dels are my faves. Of my own recipes, my favorites are the triple-ginger biscotti I developed about ten years ago. There’s another one I like from an old cookbook, but they tend to bake up chewy rather than crispy. To date, though, I haven’t tried a GF version of either of those recipes.

This recipe from Cook’s Illustrated makes small, crisp snaps not unlike the Mi-Dels and the TJ’s cookies. I’ve since made a gluten-free version of these cookies using Bob’s Red Mill Gluten Free All Purpose Baking Flour. When I made the dough and tasted it, as I usually do with any cookie dough, I was shocked by the bitter flavor. It turns out that the Bob’s blend has a fair amount of garbanzo and sorghum flour in the blend, which have a very strong taste in raw batter, and I was scared that I’d just made something pretty gross. However, once the cookies baked all trace of bitterness disappeared and I ended up with beautiful and spicy crispy gingersnaps.

The list of ingredients is impressive and the baking rotation always confounds me. But they are worth the effort to get the depth and spiciness that makes them such a favorite. Also, about a dozen-and-a-half of these beauties crushed into roasted banana ice cream is amazing.

Cook’s Illustrated Gingersnaps

For the best results use freshly opened packages of dried spices.

2 ½ cups (12 ½ ounces) all-purpose flour
2 teaspoons baking soda
½  teaspoon salt
1 ¼ cups packed (8 ¾ ounces) dark brown sugar
¼ cup molasses
2 tablespoons finely grated fresh ginger
12 tablespoons unsalted butter
2 tablespoons ground ginger
1 teaspoon ground cinnamon
1/4 teaspoon ground cloves
1/4 teaspoon pepper
Pinch cayenne
1 large egg, plus 1 large yolk
½ cup granulated sugar

Whisk flour, baking soda, and salt together in bowl. Place brown sugar, molasses, and fresh ginger in second bowl. Heat butter in 10-inch skillet over medium heat until melted. Lower heat to medium-low and continue to cook, swirling pan frequently, until foaming subsides and butter is just beginning to brown, about 2 minutes. Remove from heat and whisk in ground ginger, cinnamon, cloves, black pepper, and cayenne. Cool slightly, about 2 minutes. Add butter mixture to bowl with brown sugar and whisk to combine. Add egg and egg yolk add whisk to combine. Add flour mixture and stir until just combined. Cover dough tightly with plastic wrap and refrigerate until firm, about 1 hour. (Dough can be refrigerated for up to two days, or frozen for up to a month.)

Adjust oven racks to upper-middle and lower-middle positions and heat oven to 300 degrees. Line two baking sheets with parchment paper. Place granulated sugar in shallow baking dish or pie plate. Divide dough into heaping teaspoon portions; roll dough into balls. Working in batches of 10, roll balls in sugar to coat. Evenly space dough balls on prepared baking sheets, 20 dough balls per sheet.

Place one sheet on upper rack and bake for 15 minutes. After 15 minutes, transfer partially baked top sheet to lower rack, rotating 180 degrees, and place second sheet of cookies on upper rack. Continue to bake until lower tray of cookies just begin to darken around edges, 10 to 12 minutes longer. Remove lower sheet of cookies and shift upper sheet to lower rack and continue to bake until beginning to darken around edges, 15 to 17 minutes. Slide baked cookies, still on parchment, to wire rack and cool completely. Cool baking sheets slightly and repeat step 3 with remaining dough balls.

Yield: 80 1 ½-inch cookies

Marcella Hazan is Dead

Goodbye, Marcella

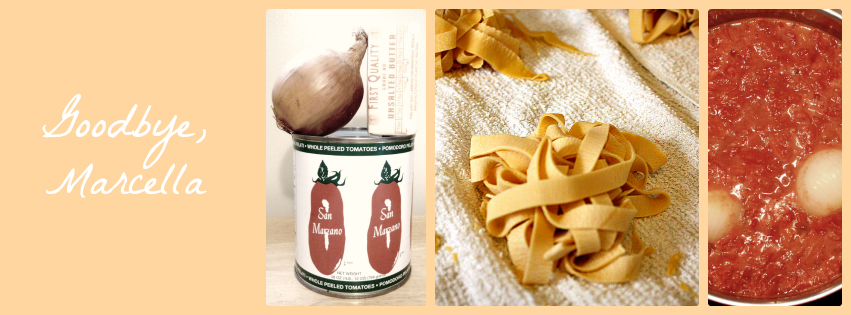
I was working all day, building a site for a wonderful event in San Diego called Cake Bake, and I missed the news earlier in the day that Marcella Hazan passed away today at the age of 89. Hazan was a force in the kitchen, and her influence on Italian cuisine in America is impossible to overstate. Her lasting influence in my kitchen will her Tomato-Butter Sauce, another of my so-called best recipes. I didn’t know Mrs. Hazan, but if you can know a person through her perfect recipes, then I suspect she was uncomplicated on the surface and delightfully complex inside.

I’m embarrassed to admit that I only started making this sauce about two years ago. We had huge #10 cans of tomatoes in our cupboard, and with only two of us I worked hard to find new ways to use them after I’d exhausted some of our traditional repertoire. A good, dependable tomato sauce had always eluded me. Mine always came out strangely sweet or bitter, and I struggled with whether I should make a quick-cook sauce or do a day-long simmer. At its best my sauce was slightly worse than an average store-bought marinara.

Where I first found the recipe I’m not sure. Most certainly it was on a blog, possibly on Smitten Kitchen. But once turned on to it, I couldn’t seem to get away from it–Hazan’s Tomato-Butter Sauce kept popping up everywhere. Mention-itis, as Bridget Jones would say. Was it possible that this sauce of beautiful simplicity had been right under my nose for years, but I’d overlooked it?

Last winter, when there wasn’t an abundant variety of vegetables available in Tashkent, we slowly worked our way through about ten of those #10 cans, making a pot of sauce each week. I had planned to make some today, but the day got away from me. It would have been a fitting eulogy.

Marcella Hazan’s Tomato Sauce with Butter and Onion

28-ounce can peeled plum tomatoes, no salt or herbs added
5 tablespoons unsalted butter
1 small white onion, peeled and cut in half
Kosher salt

Add the tomatoes, butter, onion halves, and a pinch of salt to a 4-quart saucepan. Bring to a simmer over medium-high heat, then lower the heat. Crush the tomatoes lightly with the back of a spoon as they cook, and stir occasionally. Simmer very gently for 45 minutes, until much of the liquid reduces and the butter droplets separate from the tomatoes. Remove and discard the onion.

According to Giuliano Hazan’s version of his mother’s recipe, “The sauce is done when the butter has separated from the tomatoes and there is no remaining liquid.”

Serve over hot pasta with Parmesan, if desired.

Note: this sauce freezes beautifully, but making a double batch takes much longer than 45 minutes, based on my experience. Also, you don’t have to discard the onion. I think it’s delicious, so I usually save it and separate off a few rings to nibble on while finishing dinner.

A Day in the Life

Della Mae members Courtney Hartman and Kimber Ludiker make a new friend in Khiva. (U.S. Embassy photo)

Frequently people ask me what it was like to be a public diplomacy officer in the Foreign Service of the U.S. Department of State. “Hard,” is my off-the-cuff answer. My job as Information Officer, colloquially known as press attaché, included a number of key responsibilities:

  • Daily press briefings with the Ambassador and senior staff
  • Drafting press guidance and talking points on a variety of issues
  • Managing the Embassy’s social media strategy, important in a country with press restrictions
  • Identifying speakers for weekly outreach programs
  • Working with libraries and librarians to fund English-language materials
  • Traveling with the Ambassador on site visits throughout the country
  • Coordinating press events such as monthly press conferences and exclusive interviews with the Secretary of State
  • Creating media plans to promote educational and cultural programs in a country with press restrictions
  • Monitoring the on-the-ground situation for working journalists
  • Promoting information about the services of the Embassy’s consular section, including American Citizen Services and visa services for local citizens

There’s definitely more to the job, but that’s a pretty good start. As you can imagine, on any given day I might have other things come up, such as unconfirmed reports that the President of the country had a massive heart attack!


When I think back on my favorite aspects of the job, they definitely relate to promoting the cultural programs we worked so hard to present for the Uzbek public. During my time in Uzbekistan we had photographers, poets, basketball players, musicians, and dancers come to Tashkent and other cities for master classes, performances, competitions, and more. I had an amazing time traveling with our cultural envoys and coming up with interesting ways to share their work with the citizens of Uzbekistan.


The talented students of the Urgench arts kolej perform for arts envoy and photographer Frank Ward.


One of my most memorable experiences was the tour of bluegrass group Della Mae, an all-female bluegrass band that spent about a week in Uzbekistan. Della Mae came to Uzbekistan as part of the American Music Abroad program which is “designed to communicate America’s rich musical contributions to the global music scene as it fosters cross-cultural communication and people-to-people connection to global audiences.” Their openness to working with local musicians led to the spontaneous creation of a bluegrass/Uzbek folk fusion that we started calling “Blue-Uz-Grass.” They sang, gave master classes, jammed with local musicians, and performed a fantastic sold-out concert at one of Tashkent’s premier music halls. I had the pleasure of traveling with the group to the great Silk Road city of Khiva and to nearby Urgench where there’s an incredible performing arts high school, known locally as a kolej.


[youtube]https://www.youtube.com/watch?v=At9mDNHLW3g&list=TLFHU2Ny2uffM[/youtube]


My role with Della Mae’s visit was to coordinate social and traditional media coverage, put together a press conference and press preview performance, and to travel with the group to the kolej in Urgench where we’d had successful arts envoy programs in the past. We did a number of things to promote Della Mae on social media, from tweeting to posting tons of photos on Facebook, and sharing videos such as the one above through YouTube and the local video sharing site Mover.uz. The video you see above was posted to the Embassy’s YouTube channel–and it’s received over 400 views, despite the fact that YouTube is banned in Uzbekistan.

We live tweeted the event in three languages: English, Uzbek, and Russian:


We had a great team at the Embassy supporting this visit: the cultural affairs officer and cultural assistant did all the advanced planning to set up the program and supported the band while in country; our multi-tasking staff ran around with cameras to multiple sites to document all the fun (and work!); our  press assistants worked on media releases, interviews, and the press event; and our social media team collaborated to keep our Facebook and twitter communities involved in real time. All along the way we had a staffer from American Music Abroad offering even more social media amplification of the visit.

It was an exhausting week, but worth it in so many ways. I’ll leave you with one of the several Facebook albums we created to share Della Mae’s tour with a larger audience. Our roving photographers followed the band throughout their tour, capturing behind-the-scenes shots of the band working with other musicians, with students, and performing in master classes. This is just a snapshot of what they saw. You can see more if you “like” the U.S. Embassy’s Facebook page!


[fbalbum url=https://www.facebook.com/media/set/?set=a.10151495806909186.581651.9631659185&type=3]

Keeping Passover in Uzbekistan

Keeping Passover in Uzbekistan is…a challenge. It should come as no surprise that Manischewitz and Streit’s don’t have local factories, so getting a hold of the Passover products we’ve learned to rely on in the U.S. is a bit of a challenge. Last year I asked my mom to send us a care package of key items, such as matzo meal, cake meal, potato starch, and a few other goodies. She also sent us a giant 5-pack of matzos, and I’ll confess that we still have a couple boxes tucked away somewhere. I’m fairly certain that a) you’re supposed to buy new products each and year, and b) 1-year old matzo-based foods can’t really get any staler than they were the day they arrived last March, so I’m not going to worry about a).

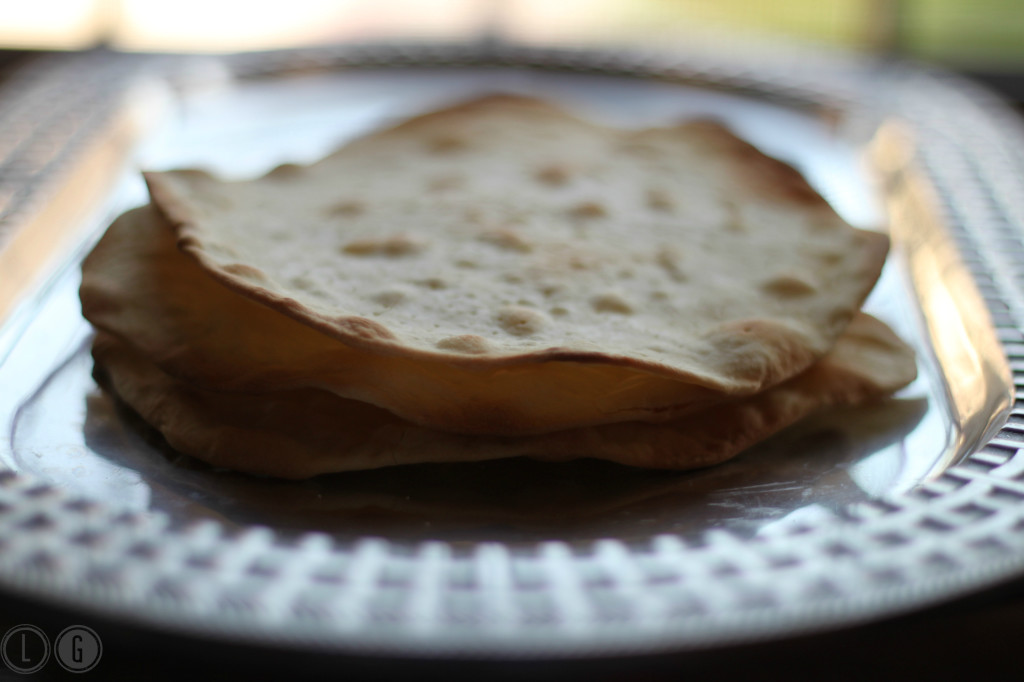
Instead, I’m going to share the greatest discovery we made in preparing for Passover last year: homemade matzo. With the absence of kosher-for-Passover products, keeping Passover here is somewhat more symbolic than serious, so obviously these matzo aren’t strictly kosher. I believe that they can be made in a strictly kosher manner, but I’d have to refer you to your rabbi for advice on that one! It’s impossible for me to describe the flavor of these matzo, except to say that they taste both fresh and flavorful, and nothing at all like the dry, cardboard-like typical boxed matzo. This recipe originally appeared in the The New York Times.

Matzo WM.jpg

Olive Oil Matzo by Mark Bittman

2 cups flour

1/2 teaspoon salt

1/3 cup olive oil

Sea salt, optional.

1. Heat oven to 500 degrees. Put flour, salt and olive oil in a food processor. Once machine is on, add 1/2 cup water. Continue to run machine until dough forms a firm ball, rides around on blade and is not at all sticky. (If you prefer, whisk together the water and oil and add this to machine all at once.)

2. Cut dough into 12 small balls — this is easiest if you cut the ball in half, then half again, then into thirds — and flatten each into a 3- to 4-inch patty. On a well-floured surface, use a rolling pin to roll each patty into a 6- to 8-inch circle. The shapes can be irregular, but dough should be so thin you can almost see through it.

3. Put dough on ungreased cookie sheets, sprinkle with sea salt if you like, and bake for about 2 to 3 minutes, keeping a very close eye on breads — they can burn very quickly. Once they begin to puff up and brown, flip and cook for another minute or so on second side. Repeat with all the dough and let cool completely.

Yield: 12 servings.