Quinoa Apple-Coconut Breakfast Porridge

Let’s just pretend that I never stopped blogging here, shall we?

This is a vegan breakfast porridge inspired by a yummy-looking meal my co-worker had at work last week. I’ve recently been advised to avoid oats (which I’m doing, against my better judgment), but I’ve wanted a warm, porridge-y breakfast during the recent spot of cold weather. This came together quickly, and makes 4 portions, so it’s a quick batch that makes several breakfasts.

Quinoa Apple-Coconut Breakfast Porridge
Author: Lisa Goodgame
Prep time:
Cook time:
Total time:
Serves: 4
Ingredients
  • 1 c. quinoa
  • 1/2 c. water
  • 1/2 c. coconut milk (canned variety, light is fine)
  • 1/2 c. non-dairy milk (can add more coconut milk, if desired)
  • 2 Tbsp. unsweetened flake coconut
  • 2 Tbsp. flaxseed meal
  • 1 medium apple, chopped in large dice
Instructions
  1. Heat medium-sized saucepan over medium heat
  2. Add quinoa, and stir to toast, approximately 3 minutes
  3. Remove pan from heat and add milks and water. Be careful, as the liquid is likely to spit.
  4. Replace pan on burner, and add coconut, flaxseed, and apple
  5. Bring to a simmer and reduce heat to low
  6. Cover and cook for 15 minutes
  7. Remove pan from heat and allow to rest for 5 minutes
  8. Fluff, and enjoy!
  9. As desired, you can add additional toppings, such as chopped nuts, maple syrup, cinnamon, and more.
Serving size: Scant 1 cup Calories: 244 Fat: 7.5g Saturated fat: 3g Unsaturated fat: 1.2g Trans fat: 0 Carbohydrates: 38 Sugar: 3.6g Sodium: 49mg Fiber: 5.4g Protein: 8g Cholesterol: 0mg
Notes
Nutritional data via SparkPeople Recipe Builder. Caveat lector.

Hatch Pepper Hummus: Hatch Fever Continues

Hatch Chile HummusI always associate Hatch chile season with our move to Austin. The week we were here looking for a place to live before the big move coincided with the Hatch chile festival at Central Market, and thus my obsession began. I’ve rarely bought anything besides the chiles themselves, but this year I tried the roasted Hatch chile hummus and fell in love. I bought three tubs to prolong the festival feeling, but those were gone in short order. With my freezer stocked with 20 pounds of roasted chiles (hot, if you must know) I decided to give it a try and make my own. I adapted my recipe from this great base on Confections of a Foodie Bride. To make a super smooth hummus I use Alton Brown’s slow cooker chickpeas recipe. The trick is 1/2 tsp baking soda added to the cooking water–it dissolves the chickpea skins for smoother blending.


Hatch Pepper Hummus: Hatch Fever Continues
Recipe Type: Appetizer
Author: Lisa Goodgame
Prep time:
Total time:
Serves: Approx. 2 cups of hummus
Ingredients
  • 3 cups chickpeas, drained and rinsed (roughly 1.5 cans)
  • 2 cloves garlic
  • 3 Hatch chiles, roasted, seeded, and chopped
  • Juice of 1.5 limes
  • 1/2 tsp salt
  • 1/4 tsp cumin
  • 3 Tbsp tahini
Instructions
  1. Place the chickpeas and garlic in the food processor and process until smooth, occasionally scraping down the bowl.
  2. Add the hatch chiles, lime juice, salt, and cumin and process again, scraping the bowl as needed.
  3. Add tahini and process until completely smooth.
  4. Transfer to a bowl and refrigerate until ready to serve, topped with additional chopped chiles as desired.

My Favorite Muffins

Banana muffinI admit, I’m on the anti-pumpkin spice bandwagon. I like my pumpkin spice goodies to contain actual pumpkin, and these muffins are my favorite pumpkin spice carriers.

This is my go-to muffin recipe, and it works well with either pumpkin or banana. They aren’t vegan, but I like to use “flax eggs” in place of eggs in the recipe for a great texture, extra fiber, and some good Omega-3s. They can easily be adapted for vegans using sugar or another liquid sweetener of choice and an equal amount of soured non-dairy milk. My King Arthur’s Baking Companion recommends 1 cup sugar : 3/4 cup honey for substitution. This recipe is so moist I wouldn’t increase the liquid, but if it seems too dry, add a couple tablespoons water or whey if you have it on hand. This is an original recipe, inspired by recipes I’ve tried over the years, from Cooking Light to Nancy Silverton.


Flax Pecan Muffins
Recipe Type: Baked good
Author: Lisa Goodgame
Prep time:
Cook time:
Total time:
Serves: 12
Ingredients
  • 2 tbsp ground flax seed
  • 1/3 c. warm water
  • 1 cup all-purpose flour
  • 1 cup whole wheat flour
  • 1 tsp baking soda
  • 1 tsp baking powder
  • 1/2 tsp kosher salt
  • 1/2 tsp ground cinnamon
  • 1/2 tsp ground nutmeg
  • 1/4 tsp ground ginger
  • 1 cup canned pumpkin or 2 large bananas, pureed
  • 1/2 cup plain yogurt OR whey
  • 1/2 cup honey
  • 1/4 cup coconut oil, melted
  • 1 tsp vanilla extract
  • 12 pecan halves, chopped and toasted
Instructions
  1. Pre-heat oven to 350 degrees.
  2. Lightly grease muffin tin with coconut oil.
  3. Allow yogurt or whey to come to room temperature to prevent coconut oil from solidifying when mixed.
  4. Mix flax seed with warm water and set aside.
  5. While mixing ingredients, toast pecans for 5 minutes.
  6. Combine dry ingredients (flour through ginger) in a large mixing bowl, whisking well.
  7. Combine the remaining wet ingredients, including the flax mixture, in another bowl, whisking well.
  8. Add wet ingredients to dry, stir just until moist.
  9. Lightly stir pecans into the batter.
  10. Divide evenly among 12 prepared muffin cups.
  11. Bake for 25-30 minutes, or until muffins test done with a toothpick.
  12. Cool in tin for 10 minutes on a wire rack. Remove from tin and cool completely.


Many Posts, All Undone

Honey-Flax GranolaI have a bunch of posts half-written that may never see the light of day. I figured I would just get back on the horse and write a little something. The last few months have had their difficulties, and writing just wasn’t something I wanted to do. But I’m started to feel it again. What will follow today, I’m not certain, but let’s see, shall we?

Today I made a magnificent smoothie for breakfast. Unfortunately there’s no picture of it since I wolfed it down. I think it was magnificent because I used some rich coconut milk (the real stuff, not the Silk or whatever they sell in the refrigerated section), so it was thick and delicious. I mixed in some frozen bananas, pineapple, and mango, a little ground flax and chia seeds, and finally a big handful of baby greens. Topped off with a couple of tablespoons of homemade granola (oh, I do have a picture of that!), and it was delicious.

Tropical Green Smoothie
Recipe Type: Smoothie, Breakfast, Snack
Cuisine: Vegetarian, Vegan
Author: Lisa Goodgame
Prep time:
Total time:
Serves: 1-2
Whip this up for a quick, bright breakfast or a filling snack.
Ingredients
  • 1 frozen banana, sliced
  • 1/2 cup frozen pineapple
  • 1/3 cup frozen mango
  • 1 date, coarsely chopped
  • 1/2 to 3/4 c. non-dairy milk (coconut adds to the tropical flavor)
  • 1/2 Tbsp. ground flax seed
  • 1/2 Tbsp. chia seeds
  • large handful baby greens (about 2 oz.)
Instructions
  1. Place fruit, 1/2 cup milk, and seeds into the blender jar.
  2. Blend until the fruit starts to break up. Mixture will be very thick, add additional milk if needed.
  3. Stop blender and add greens, pressing them into the mix with a spatula.
  4. Blend again until smooth, stopping and scraping down if needed.

Coconut-Cardamom Rice Pudding

Coconut Cardamom Rice PuddingIt’s been a busy few weeks with huge deadlines in November and, of course, Thanksgiving. Admittedly I didn’t do a great job of blogging a favorite food holiday, and maybe next year I’ll be more organized about it. I do plan to tell you about the best pecan I’ve ever made, and maybe ever eaten.

Over the last three weeks or so we’ve had two brutal cold snaps each lasting about five days, with a stretch of super spring-like weather in between. The cold has put me in the mood for everything comfort food: turkey pot pie made with leftover holiday bird, mini turkey chile meatloaves (which go well with roasted sweet potatoes or squash), green chile mac and cheese, roasted root vegetables, and more. I was trying to work out what to make for a warming dessert now that the rich and heavy holiday pies are gone, and I thought about a rice pudding I used to make.

I couldn’t find my old recipe so I did a little searching online to look for some ratios and came up with a fragrant and creamy dish that combines coconut milk and cardamom with leftover rice. The dish is easy, but takes a little attention at the stove while it simmers. Avoid bringing the pudding to a full-on boil, especially once the egg is added. If you don’t have (or don’t like) cardamom, you can leave it out or substitute a piece of cinnamon stick. This is delicious warm or cold, and it makes a nice, albeit sweet, breakfast, too.

Coconut-Cardamom Rice Pudding

2 cups cooked rice, chilled (I’ve used brown basmati and brown jasmine most often)
1 can of unsweetened coconut milk (light or regular)
4 green cardamom pods, lightly cracked
1 egg
3 tablespoons brown sugar
1 teaspoon vanilla extract

Combine cooked rice in a saucepan with coconut milk and cardamom and bring to a simmer. Whisk egg and brown sugar in a small bowl. Add 1/2 cup of the warm coconut milk mixture to the egg to tempter it slightly. Pour the egg and coconut milk mixture back into the saucepan, whisking to combine. Simmer over low heat for 20 minutes, stirring regularly until thickened. Remove from heat and stir in vanilla extract. Serve warm or chilled.

Recipe Testing: Maple Sweet Potato Cakes with Curried Greek Yogurt

Sweet potato cakes sweetened with maple syrup. Recipe from Food52 and FoxesLoveLemons.

A few weeks ago I volunteered to test some recipes from the Food52 site that were part of the Your Most Impressive Dinner Party Side Dish contest, including these sweet potato cakes by FoxesLoveLemons. I thought they might make a nice Thanksgiving side dish, or a possible alternative latke for Hanukkah. I think they work for either of those holidays, or both if you’re doing Thanksgivukkah this year.

While this recipe didn’t win the overall title as most impressive, it was chosen on Food52 as a community favorite, and my headnote (which is a shorter version of this blog post) is published with it. All three people eating Sunday dinner called them a win, and asked me to make them again. I think my sister might have sneaked out with the leftovers.

When I made this recipe as written I had trouble with the cakes scorching and not cooking all the way through. My solution was to make more cakes so that they were thinner and would cook through without burning.

The curried Greek yogurt is an excellent sauce, one that I can see repurposing for many different dishes. The balance of spice with the creamy tang of the yogurt hits all the right notes. I think it would make an excellent base for a curried carrot salad.
My tips for making this recipe are:
  • a bit more salt added to the sweet potato mixture before cooking
  • divide the recipe into 12 cakes
  • add a bit of cooking oil to the pan–cooking spray isn’t sufficient to achieve even browning

Maple Sweet Potato Cakes with Curried Greek Yogurt

Makes 12 cakes

 
Curried Greek Yogurt

7 ounces 2% Greek yogurt
1/2 teaspoon curry powder
1/4 teaspoon salt
1/4 teaspoon ground black pepper

Maple Sweet Potato Cakes

1 large sweet potato, peeled and shredded
1/2 teaspoon kosher salt
1 egg
1 1/2 tablespoon maple syrup
1/2 teaspoon ground white pepper
1/2 teaspoon paprika
1 pinch of salt
1 pinch of cinnamon
1/3 cup minced yellow onion
1/3 cup panko breadcrumbs
Nonstick cooking spray
Cooking oil to coat the skillet

In a small bowl, stir together all ingredients for Curried Greek Yogurt. Set aside.

Place shredded sweet potato in a large bowl and toss with salt. Let stand 5 minutes.

In a second large bowl, whisk together egg, maple syrup, white pepper, paprika, salt and cinnamon. Using your hands, squeeze all excess liquid out of sweet potato; discard liquid. Add sweet potato, onion and breadcrumbs to egg mixture; toss to combine well.

Form sweet potato mixture into 12 cakes. Heat a griddle or large nonstick pan over medium high-heat. Spray griddle with nonstick spray or coat with a thin sheen of cooking oil; place potato cakes on griddle. Cook 8 to 10 minutes or until golden brown and crispy on the outside, flattening with spatula as they cook and flipping occasionally. Serve immediately with Curried Greek Yogurt.

Guest Blogging Over at Full and Content

Kale Salad collage

Today I have a guest post over at Lisa Rawlinson’ fabulous blog Full and Content. Lisa is a fellow Austin Food Blogger Alliance blogger, and since her blog has been around for a while she has so many incredible recipes and reviews that you should check out.

Lisa is a big proponent of Meatless Mondays, a world-wide movement to reduce meat consumption for personal health reasons and for the health of the planet. You can find more info here. This week I contributed a favorite recipe, Lisa G’s Mac & Cheese, and new “recipe” that’s more of a technique than anything–Kale Salad. I thought these made up a perfect Sunday night dinner for this break of autumnal weather we’re having this weekend. I love seasonal cooking, and I really broke into my CSA veggie box for this week’s meal.

Head over to Full and Content for my recipes and many others to start planning your Meatless Monday!

Serious Addiction

Savory Pine NutsI have a new addiction and I have to keep it out of sight, otherwise I’ll eat every last little bite.

The other day I mentioned the broccoli rabe recipe with pine nuts and lemon that I tested for Food52. I didn’t go into much detail, and I’ll share my notes after the contest the recipe is in moves forward. However, I’ve got to talk about the pine nuts.

Toasted pine nuts are yummy. They are an extra special crunch when tossed on a plate of hummus, and they give pesto its delicate richness, but on their own they don’t really excite me. That all changed with the addition of a splash of worcestershire sauce, some crushed dried rosemary, salt and pepper.

In all honesty, it sounded like a strange combination, and when I added the worcestershire to the freshly toasted nuts the aroma nearly knocked me out. I persevered, stirring until the moisture evaporated and the nuts retained the salty, umami hit of flavor. I tasted one and it was fine.

Little did I know how the flavor would continue to develop. The first night, when we had the greens, polenta, and chicken, the tasty little gems really perked up the polenta. Last night, as I put together a leftover plate I snagged a few pine nuts from the container and my taste buds lit up. They were like the most delicious, indulgent bar snack you could ever imagine. I could swallow handfuls down with some gluten-free beer.

Savory Pine Nuts (via Food52)

1/2 cup pine nuts
1 teaspoon Worcestershire sauce, or more, to taste
1/4 to 1/2 teaspoon freshly ground dried rosemary
1 large pinch of salt
Ground pepper, to taste

  1. In a dry skillet over medium heat, gently toast the pine nuts until light brown and fragrant.
  2. Remove to a small bowl, sprinkle on the rosemary and salt, and toss well.
  3. Drizzle the Worcestershire sauce slowly and carefully over the pine nuts. Toss well to coat.
  4. Add more salt and pepper to taste.

My Best Recipe: Honey-Flax Granola

Honey-Flax GranolaMy Best Recipe is definitely becoming a series! If you haven’t read my original post, the idea of a “best recipe” is one that is consistent, uses just a handful of staple ingredients, is easy to remember, and comes together with a minimum of fuss. This granola recipe fits nearly all those requirements, but it does take a bit of attention to make sure it doesn’t go from toasted to roasted while you weren’t watching.

As I mentioned yesterday, when I first started making this recipe it was kosher for Passover, made with matzo farfel, which is essentially rolled oat-sized bits of matzo. The original recipe came from Streit’s Matzos, and it’s terrifically flexible for Passover and any time of year. For the record, the other recipes on the Streit’s site look a bit…odd, but the mandel bread recipe is gold standard.

Once I started making granola on a regular basis in Uzbekistan, I became a frequent customer on the honey aisle in our local bazar. Vendors there had honeys collected from various parts of Uzbekistan and other countries in the region. Last year I had the great fortune to visit a beekeeper’s association in the Ferghana Valley where I purchased a liter of honey directly from the beekeeper and found this little guy when I opened the jar:

Bee spoon

I haven’t encountered any stowaways in my local Good Flow honey yet, but there’s a first time for everything!

This recipe is what I’d call a base recipe–it’s one you can build on and modify with any mix-ins you like. To prevent any nuts and dried fruits from burning I add them all at the end, after the granola comes out of the oven. It’s hard to say how many servings this makes–that all depends on how many mix-ins you add to the base recipe.

Finally, I’ve recently started making the granola with coconut oil. I haven’t tried a blend of oils, but I suspect it would work pretty well. My only hesitation in using 100% coconut oil is the expense, but it is super delicious and so far it’s been worth it. If you’re gluten-free and can eat oats, just be certain to use certified gluten-free oats.

Honey-Flax Granola

6 cups rolled oats
1/2 cup oil
1/2 cup honey
1/4 cup ground flax meal
Ground cinnamon and ginger to taste
Pinch salt
Mix-ins of your choice (I usually add about 1 cup total of nuts and fruits, and toasted seeds and coconut would work well)

Preheat the oven to 350 degrees. Line a half-sheet pan or two cookie sheets with sides with foil or a silicone baking mat. Spread the oats evenly over the baking sheet. Bake for 15 to 20 minutes until lightly toasted, stirring 2-3 times while baking. Remove oats from oven and reduce heat to 325 degrees.

Combine oil and honey and heat until bubbly. Carefully pour oats into a large, heat-resistant mixing bowl, reserving baking sheets. Pour oil/honey mixture over the oats and mix until the oil and honey are absorbed. Add the flax meal, salt, and a generous sprinkle of cinnamon and/or ginger. Stir to combine and taste to adjust seasoning. Return the mixture to the reserved baking sheets.

Continue baking at 325 degrees for 15-20 minutes longer. Remember to stir every 5-7 minutes to prevent uneven baking, taking care to make sure the edges don’t burn. When nicely toasted, place in a large bowl and the mix-ins. Let the mixture cool and then store in an airtight container.

NOTE: This recipe will go from just perfect to overdone in a flash. Be very vigilant in the last 5-7 minutes of baking to make sure it doesn’t burn.

Cookie Bites (Part 2)

Cookie Collage
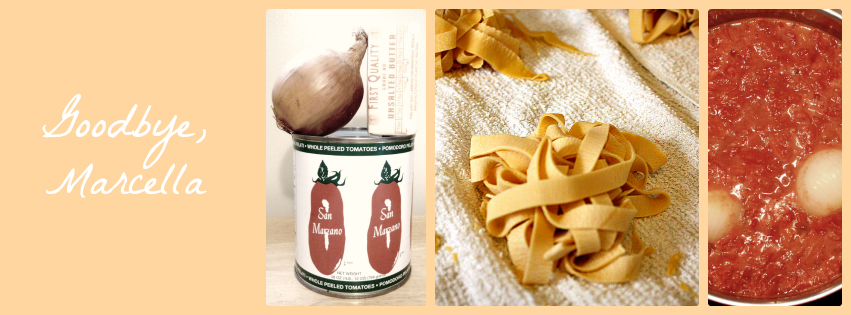
Today’s cookie recipe was given to me by a baker friend who took pity on my total lack of gingersnaps while we were living in Uzbekistan (pictured bottom right). Most of the key ingredients for gingersnaps are easily available there, with the exception of molasses, and fortunately we squirreled a couple bottles away when we headed overseas so we could make a few of our favorites.

I love ginger cookies of all sorts. Commercially, Trader Joe’s Triple Ginger Snaps and the old-school Mi-Dels are my faves. Of my own recipes, my favorites are the triple-ginger biscotti I developed about ten years ago. There’s another one I like from an old cookbook, but they tend to bake up chewy rather than crispy. To date, though, I haven’t tried a GF version of either of those recipes.

This recipe from Cook’s Illustrated makes small, crisp snaps not unlike the Mi-Dels and the TJ’s cookies. I’ve since made a gluten-free version of these cookies using Bob’s Red Mill Gluten Free All Purpose Baking Flour. When I made the dough and tasted it, as I usually do with any cookie dough, I was shocked by the bitter flavor. It turns out that the Bob’s blend has a fair amount of garbanzo and sorghum flour in the blend, which have a very strong taste in raw batter, and I was scared that I’d just made something pretty gross. However, once the cookies baked all trace of bitterness disappeared and I ended up with beautiful and spicy crispy gingersnaps.

The list of ingredients is impressive and the baking rotation always confounds me. But they are worth the effort to get the depth and spiciness that makes them such a favorite. Also, about a dozen-and-a-half of these beauties crushed into roasted banana ice cream is amazing.

Cook’s Illustrated Gingersnaps

For the best results use freshly opened packages of dried spices.

2 ½ cups (12 ½ ounces) all-purpose flour
2 teaspoons baking soda
½  teaspoon salt
1 ¼ cups packed (8 ¾ ounces) dark brown sugar
¼ cup molasses
2 tablespoons finely grated fresh ginger
12 tablespoons unsalted butter
2 tablespoons ground ginger
1 teaspoon ground cinnamon
1/4 teaspoon ground cloves
1/4 teaspoon pepper
Pinch cayenne
1 large egg, plus 1 large yolk
½ cup granulated sugar

Whisk flour, baking soda, and salt together in bowl. Place brown sugar, molasses, and fresh ginger in second bowl. Heat butter in 10-inch skillet over medium heat until melted. Lower heat to medium-low and continue to cook, swirling pan frequently, until foaming subsides and butter is just beginning to brown, about 2 minutes. Remove from heat and whisk in ground ginger, cinnamon, cloves, black pepper, and cayenne. Cool slightly, about 2 minutes. Add butter mixture to bowl with brown sugar and whisk to combine. Add egg and egg yolk add whisk to combine. Add flour mixture and stir until just combined. Cover dough tightly with plastic wrap and refrigerate until firm, about 1 hour. (Dough can be refrigerated for up to two days, or frozen for up to a month.)

Adjust oven racks to upper-middle and lower-middle positions and heat oven to 300 degrees. Line two baking sheets with parchment paper. Place granulated sugar in shallow baking dish or pie plate. Divide dough into heaping teaspoon portions; roll dough into balls. Working in batches of 10, roll balls in sugar to coat. Evenly space dough balls on prepared baking sheets, 20 dough balls per sheet.

Place one sheet on upper rack and bake for 15 minutes. After 15 minutes, transfer partially baked top sheet to lower rack, rotating 180 degrees, and place second sheet of cookies on upper rack. Continue to bake until lower tray of cookies just begin to darken around edges, 10 to 12 minutes longer. Remove lower sheet of cookies and shift upper sheet to lower rack and continue to bake until beginning to darken around edges, 15 to 17 minutes. Slide baked cookies, still on parchment, to wire rack and cool completely. Cool baking sheets slightly and repeat step 3 with remaining dough balls.

Yield: 80 1 ½-inch cookies
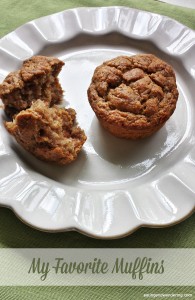
Cookie Bites (Part 1)

Cookie CollageOver the next couple of days I’m going to share some awesome cookie recipes, starting with my all-time number one favorite cookie in the world.

In 1998 I moved to San Antonio and became addicted to Central Market‘s Chocolate Crispy Cookies. For nine months I bought one package of six cookies for $4.99 each week. I was working at the McNay Art Museum as a graduate intern and my tiny stipend meant that my splurges had to be modest and meaningful. Since I ate every meal at home and took my lunch to work most days, my chocolate crispy cookies were a guilty pleasure and indulgence.

After my internship ended I moved back to California and left the chocolate crispy cookies behind. I missed them terribly and every so often I would try to suss out the secrets of the gooey inside, the crispy outside, and the rich chocolate flavor. I usually ended up with some version of a chocolate-chocolate chip cookie or a brownie bite. The cookies were fine, but they weren’t my beloved Central Market sweetness.

In 2004 I bought the New York Times Jewish Cookbook in preparation for the upcoming Jewish new year, Rosh Hashana. As I sat on the sofa leafing through the book, admiring the depth and breadth of the recipes, my heart started pounding when I saw it: Chocolate Chewies. The recipe was contributed by Joan Nathan, one of the grand dames of Jewish cuisine, and adapted from the cookbook Gottlieb’s Bakery–100 Years of Recipes. I knew immediately that this was the recipe. With only 4 (or 5, depending on if you use the flour) ingredients, it remains a mystery how they can be so tremendously delicious.

You can double this recipe, but since these cookies are very susceptible to drying out so I prefer to make the small batch unless I know I’m baking for a crowd.

Chocolate Chewies (or Chocolate Crispy Cookies)

3 c. powdered sugar
1/2 c. good quality unsweetened cocoa
2 Tbsp. flour
3 egg whites
2 c. chopped pecans

Heat oven to 350 degrees, and line two cookie sheets with parchment paper.

Place sugar, cocoa and flour in bowl of an electric mixer, and beat until well blended. Beat in egg whites one at a time, scraping bowl as necessary. Beat at high speed for 1 minute. Stir in pecans.

Drop heaping tablespoons onto cookie sheets, leaving 2 inches between cookies. Bake 15 minutes on center rack, turning sheet halfway through baking time. Remove from oven. Cool, then peel cookies off parchment.

Store in airtight container or freeze.

Yield: approximately 10-12 cookies

As printed in the New York Times Jewish Cookbook

Marcella Hazan is Dead

Goodbye, Marcella

I was working all day, building a site for a wonderful event in San Diego called Cake Bake, and I missed the news earlier in the day that Marcella Hazan passed away today at the age of 89. Hazan was a force in the kitchen, and her influence on Italian cuisine in America is impossible to overstate. Her lasting influence in my kitchen will her Tomato-Butter Sauce, another of my so-called best recipes. I didn’t know Mrs. Hazan, but if you can know a person through her perfect recipes, then I suspect she was uncomplicated on the surface and delightfully complex inside.

I’m embarrassed to admit that I only started making this sauce about two years ago. We had huge #10 cans of tomatoes in our cupboard, and with only two of us I worked hard to find new ways to use them after I’d exhausted some of our traditional repertoire. A good, dependable tomato sauce had always eluded me. Mine always came out strangely sweet or bitter, and I struggled with whether I should make a quick-cook sauce or do a day-long simmer. At its best my sauce was slightly worse than an average store-bought marinara.

Where I first found the recipe I’m not sure. Most certainly it was on a blog, possibly on Smitten Kitchen. But once turned on to it, I couldn’t seem to get away from it–Hazan’s Tomato-Butter Sauce kept popping up everywhere. Mention-itis, as Bridget Jones would say. Was it possible that this sauce of beautiful simplicity had been right under my nose for years, but I’d overlooked it?

Last winter, when there wasn’t an abundant variety of vegetables available in Tashkent, we slowly worked our way through about ten of those #10 cans, making a pot of sauce each week. I had planned to make some today, but the day got away from me. It would have been a fitting eulogy.

Marcella Hazan’s Tomato Sauce with Butter and Onion

28-ounce can peeled plum tomatoes, no salt or herbs added
5 tablespoons unsalted butter
1 small white onion, peeled and cut in half
Kosher salt

Add the tomatoes, butter, onion halves, and a pinch of salt to a 4-quart saucepan. Bring to a simmer over medium-high heat, then lower the heat. Crush the tomatoes lightly with the back of a spoon as they cook, and stir occasionally. Simmer very gently for 45 minutes, until much of the liquid reduces and the butter droplets separate from the tomatoes. Remove and discard the onion.

According to Giuliano Hazan’s version of his mother’s recipe, “The sauce is done when the butter has separated from the tomatoes and there is no remaining liquid.”

Serve over hot pasta with Parmesan, if desired.

Note: this sauce freezes beautifully, but making a double batch takes much longer than 45 minutes, based on my experience. Also, you don’t have to discard the onion. I think it’s delicious, so I usually save it and separate off a few rings to nibble on while finishing dinner.

My Best Recipe: Butternut Squash Risotto

Squash blog

If ever asked, I would be hard-pressed to say what my very best recipe is, but this would be one of the handful that would leap to mind. In our foodie-obsessed culture it sometimes seems that the more retro or the more avant-garde a dish is, the more respect it commands. For me, the idea of a best recipe is one that is consistent, easy to remember, uses a handful of staple ingredients, and can be whipped together for weeknight dinner or easy weekend meals.

That’s exactly what risotto is for me. I’ve been making versions of this dish for about twenty years, adding flourishes to the basic recipe. This recipe is a best friend–it never lets me down, and picks me up when I need comfort. It’s hearty, savory, and there’s a zen to the process of making it.

One of our household favorites is pumpkin or butternut risotto. They both use the same basic recipe and take the same amount of time to make, but pumpkin from a can save a few prep steps and if you’re like us, there’s usually some in the pantry or freezer. This is a perfect fall recipe that can be made vegan or not, depending on your choice of stock and cheese.

Risotto with Butternut Squash or Pumpkin (adapted from Sundays at Moosewood Restaurant)

5 cups stock, vegetable or chicken

2 Tbsp. olive oil or butter, or a combinations of both (or sub some schmaltz for butter if you have it)

1 small yellow onion, finely chopped

1 1/2 cups arborio rice

1/2 small butternut squash, peeled and cut into 1/2″ cubes or 1 cup pumpkin puree

1/2 cup dry white wine

1/2 cup freshly grated Parmesan cheese

salt and pepper to taste

  1. Bring the stock to a boil in a medium saucepan. Lower the heat and maintain a simmer.
  2. Heat the oil and/or butter in a large, heavy saucepan on medium heat and saute the onion for 2 to 3 minutes, until translucent but not browned.
  3. Add the rice and stir for one minute to thoroughly coat the rice with oil, taking care not to break the grains.
  4. Add the wine and stir constantly until it is absorbed.
  5. If using squash, add the cubes followed by 1/2 cup of stock and stir until the liquid is absorbed.
  6. Ladle in the simmering chicken stock, 1/2 cup at a time, stirring after each addition until it is absorbed. It should take about 18 to 20 minutes to cook the rice. Reduce the stock added toward the end and increase the frequency, tasting for the point where the rice is tender but al dente.
  7. If using pumpkin puree, add the puree at the halfway point.
  8. Remove the risotto from the heat and stir in the grated cheese.

If you are vegan, this recipe is still delicious without the cheese, but will likely need a bit more salt to taste.

Either version is really lovely with a bit of sage or herbes de Provence, as well.

My First Food Publication! (umm, five years ago)

About five years ago I had my first piece of food writing published in the magazine PresenTense, put out by the innovative Jewish organization of the same name. The piece was part of an issue that looked at the ways young Jews were exploring issues concerning food in a day and age very different from that of our bubbes’ and zaydes’. My article focuses on the increasing inclusion of Sephardic (or Mediterranean) flavors into the standard American Jewish diet, and it seems especially timely now that the whole world has been swept under the influence of Yotam Ottolenghi and Sami Tamimi’s amazing cookbook Jerusalem. I didn’t have a food blog back then, so I couldn’t easily share it with everyone, unlike today.

It was a fun trip back in time to find this piece, and I hope you enjoy reading it, and maybe even eating it. I’m including the full recipe for Moroccan Salmon since the creative photo doesn’t quite capture all the ingredients. We make this recipe with some frequency, since we usually have all the bits and pieces in the house. It’s bright, flavorful, and it makes a stellar dinner party centerpiece if you double the recipe for a side of salmon, cooked whole.

Moroccan Salmon* (adapted from Cooking Light)

This recipe is filled with Mediterranean flavors. It’s easy to prepare if you have a good kitchen knife or a small food processor. This is beautiful for a holiday dinner, but easy enough for a weeknight if you use shortcuts.

1/2 cup chopped fresh flat-leaf parsley or cilantro

1 Tablespoon olive oil

2 teaspoons fresh lemon juice

1/2 teaspoon salt

1/4 teaspoon ground ginger

1/4 teaspoon ground red pepper (cayenne works well)

1/4 teaspoon ground cumin

1/4 teaspoon freshly ground black pepper

4 garlic cloves, minced

4 (6-ounce) wild-caught salmon fillets (about 1-inch thick)

Cooking spray

1 lemon

3 cups thinly sliced red bell pepper (frozen mixed bell peppers will work well)

2 tablespoons water

1 large plum tomato, cut crosswise into 1/4-inch-thick slices (or 1 can diced tomatoes, drained)

*other firm-fleshed fish works well in this recipe—let your taste buds and budget be your guide

Preheat oven to 400°.

Combine first 10 ingredients in 13 x 9-inch baking dish. Do not use an aluminum pan—it will react with the acid in the dish. Add salmon, spreading paste thickly over the fillets. Cover and let stand 15 minutes while you prepare the other ingredients. Remove salmon from dish, reserving paste in a medium bowl (you may need to scrape it gently off the fish). Rinse the 13 x 9-inch dish and coat with cooking spray. Place the salmon, skin side down, in the dish.

Cut lemon in half lengthwise; cut each lemon half crosswise into 1/8-inch-thick slices. Add the lemon slices, bell pepper slices, 2 tablespoons water, and tomato slices to the spice paste; stir gently to coat. Arrange lemon mixture in an even layer over salmon; cover with foil. Bake at 400° for about 20 minutes or until fish flakes easily when tested with a fork or until desired degree of doneness.

Top each fillet with about 1/2 cup vegetable mixture, and drizzle each serving with pan juices.

For an easy weeknight pairing, make a quick pot of couscous and toss some toasted pine nuts, almonds and pistachios on top.

A Girl and Her Tacos: Santa Monica

Rajas

A million years ago when I lived my L.A. life I had a favorite meal that was hard to come by: potato and rajas tacos at Border Grill in Santa Monica. As a poor grad student Border Grill was out of my reach except for the most special of occasions, so I bought the cookbook. It was my first brush with celebrity restaurants, and I felt as though I knew the chefs—Mary Sue Milliken and Susan Feniger—from the hours I spent watching their early Food Network show Too Hot Tamales. For the price of two orders of potato and rajas tacos I got my hands on the recipe. Today the tacos are off the menu in Santa Monica, but still available for a mere $3 each from the Border Grill food truck.

When we received our most recent CSA box from Johnson’s Backyard Garden I was flabbergasted by the haul of peppers we brought home. Our mix included a variety of sweet, or at least not hot, peppers, as well as about a dozen serranos. Some were long and red and pointy, others petite and light green with a distinct flavor, a handful dark green and tinged with red, and a few good old typical green baby bells. For nearly a week I regarded the veggie bowl on the counter each time I walked through the kitchen, confounded about how to use the immense variety.

As we wended our way through rush hour traffic to our aerials class in east Austin inspiration struck: rajas. Traditionally rajas are made with fire-roasted poblano peppers, sautéed with onions and finished with a touch of cream and cheese. Sometimes other delights sneak their way into the rajas mixture: potatoes (proven by my old favorite) and corn are popular guest stars. Since we’ve just barely moved back across the globe my old cookbook is still packed away somewhere, and with no cream on hand, I had to improvise. Once made, we layered the rajas mixture with a bit of shredded cheese and some homemade black beans topped off with a dollop of labneh into handmade corn tortillas. It was a simple dinner worthy of the memories from days gone by at Border Grill.

Quick Weeknight Rajas

1 Tablespoon vegetable oil
2 large bell peppers or their equivalent in poblanos or other mild peppers, thinly sliced
2 serrano peppers, seeds removed, thinly sliced (adjust to the heat level you prefer)
1 medium white onion, thinly sliced
2 cloves garlic, chopped
2 ears corn, kernels removed
Kosher salt

Add the oil to a heavy large skillet over medium-high heat. When the oil is hot, add the peppers, onion, and garlic and sauté until onions turn translucent. If vegetables stick, add a few tablespoons of water to deglaze the pan and continue to sauté. Add the corn and cook for an additional 3-5 minutes, or until corn kernels are crisp-tender. Remove from heat and season to taste with kosher salt.