A Girl and Her Tacos: Santa Monica

Rajas

A million years ago when I lived my L.A. life I had a favorite meal that was hard to come by: potato and rajas tacos at Border Grill in Santa Monica. As a poor grad student Border Grill was out of my reach except for the most special of occasions, so I bought the cookbook. It was my first brush with celebrity restaurants, and I felt as though I knew the chefs—Mary Sue Milliken and Susan Feniger—from the hours I spent watching their early Food Network show Too Hot Tamales. For the price of two orders of potato and rajas tacos I got my hands on the recipe. Today the tacos are off the menu in Santa Monica, but still available for a mere $3 each from the Border Grill food truck.

When we received our most recent CSA box from Johnson’s Backyard Garden I was flabbergasted by the haul of peppers we brought home. Our mix included a variety of sweet, or at least not hot, peppers, as well as about a dozen serranos. Some were long and red and pointy, others petite and light green with a distinct flavor, a handful dark green and tinged with red, and a few good old typical green baby bells. For nearly a week I regarded the veggie bowl on the counter each time I walked through the kitchen, confounded about how to use the immense variety.

As we wended our way through rush hour traffic to our aerials class in east Austin inspiration struck: rajas. Traditionally rajas are made with fire-roasted poblano peppers, sautéed with onions and finished with a touch of cream and cheese. Sometimes other delights sneak their way into the rajas mixture: potatoes (proven by my old favorite) and corn are popular guest stars. Since we’ve just barely moved back across the globe my old cookbook is still packed away somewhere, and with no cream on hand, I had to improvise. Once made, we layered the rajas mixture with a bit of shredded cheese and some homemade black beans topped off with a dollop of labneh into handmade corn tortillas. It was a simple dinner worthy of the memories from days gone by at Border Grill.

Quick Weeknight Rajas

1 Tablespoon vegetable oil
2 large bell peppers or their equivalent in poblanos or other mild peppers, thinly sliced
2 serrano peppers, seeds removed, thinly sliced (adjust to the heat level you prefer)
1 medium white onion, thinly sliced
2 cloves garlic, chopped
2 ears corn, kernels removed
Kosher salt

Add the oil to a heavy large skillet over medium-high heat. When the oil is hot, add the peppers, onion, and garlic and sauté until onions turn translucent. If vegetables stick, add a few tablespoons of water to deglaze the pan and continue to sauté. Add the corn and cook for an additional 3-5 minutes, or until corn kernels are crisp-tender. Remove from heat and season to taste with kosher salt.

Agua Fresca Obsessed

Watermelon obsessed

Sweet agua fresca from Zócalo in Austin, Texas

Real talk: aguas frescas are amazing and I’m admitting to a mild obsession. My love of the agua fresca really took off in Thailand of all places, where you can find tropical fruit “shakes” nearly anywhere for the high price of about 30 baht or $1. When I first saw “shake” on the menu I ordered with trepidation, the image of a creamy watermelon smoothie giving me pause. To my delight the shake that arrived was simply watermelon blended with ice and a bit of simple syrup, and with one sip I was hooked. Watermelon shakes followed, at least one per day for the next two weeks, interspersed with young coconuts because Thailand, people!

Having spent 80% of my life within 3 hours of the border with Mexico, I can’t help but think of a fresh, slightly sweet fruit water as anything other than an agua fresca no matter which continent serves it up. In Mexico we found the most common aguas frescas to be watermelon (sandía), pineapple (piña), hibiscus (jamaica), and a creamy rice-milk sort of beverage called horchata. And no, that’s not just a Vampire Weekend song, friends. These cold beverages with mystical live-giving properties may not be quite as inexpensive in Texas as they are in Thailand, but they are ubiquitous and refreshing in the sweltering 95+ degree heat of May.

So guys, what I’m trying to say is that when you’re drained from 2 hours of roller derby drills and you stop for a breakfast taco or two at El Chilito you also have to get an agua fresca de sandía. And then you have to realize that you can make some at home with all the leftover watermelon in the fridge from your blastalicious July 4th spectacular. Do it.

This recipe is from Whole Foods and it’s close to perfect. I cut the amount of water in half and doubled the lime juice since my delightful pink drink is sticking around in the ‘fridge for a day or two.

Watermelon Agua Fresca

Ingredients:
  • 8 cups watermelon, cut into 2-inch pieces (approximately 6 lbs.)
  • 1 cup cold water, divided
  • 2 tablespoons freshly squeezed lime juice
  • 1 tablespoon honey
  • Ice cubes
  • Lime slices and mint leaves for garnish (optional)
Method:

Cut the watermelon flesh from the rind. In a blender or food processor, process half the watermelon pieces with 1/2 cup of water until smooth. Pour through a strainer into a pitcher. Repeat the process with the remaining melon and water. You should end up with about 8 cups of juice. Stir in the lime juice and honey. Pour into ice-filled glasses and garnish with lime slices and mint.

Someday I’ll work out how to make horchata. Until then, enjoy Vampire Weekend and find a sidewalk to walk on.

[youtube]https://www.youtube.com/watch?v=MVpdi0bD6NA[/youtube]

A Father’s Day Grilled Feast

It’s barely mid-June, but deep in the heart of Texas it’s hot everyday and the locally-grown fruits and vegetables are rolling into the markets, tables groaning under the bounty of summer. With Father’s Day upon us, it was time to pick up corn, peppers, squash, tomatoes, and ‘shrooms and fire up the grill. We mighta’ sneaked a few chunks of chicken in there, too.

Grilling is nearly a state religion in Texas but, in my opinion, there’s no one way to do it rightly or wrongly. It takes a few decisions, a few key tools, a little bit of creativity, and an apron with a built-in bottle opener and koozie to keep you cool when facing the flames.

First decision: gas or charcoal. Down and dirty grillmasters and -mistresses swear by charcoal. For the last two years I grilled only on charcoal and it does have benefits, such as superior heat control and hot spots exactly where you want them. But all my recent grilling has been on gas, and what you give up in control is a trade-off for easier cleanup and possibly fewer carcinogens launched into the atmosphere.

Second decision: what to grill. I know folks swear by steaks and burgers as their grilling favorites, and while it’s hard to beat a beautifully caramelized piece of grilled flesh, vegetables take on a wholly new character when they come off the fire, delicately charred and bursting with flavor. Marinate them or not before sliding them over the flames, but do give a judicious coating of olive oil, salt, and pepper to minimize sticking and guarantee great flavor.

Third decision: direct or indirect heat. I’m definitely no expert on the benefits of direct and indirect heat for grilling meats, but when it comes to veggies I think that medium direct heat is best, and keep the grill lid closed! Not only will the food cook more efficiently, but you’ll also be rewarded with luscious grill marks and that smoky char. Place your larger, sturdier vegetables over the hottest spots of the grill, which tend to be right between two burners.

Fourth decision: skewers or not. When grilling vegetables I’m agnostic about skewers. Metal skewers do a bang-up job when grilling meat kabobs, since they conduct the heat through the center and help it to cook evenly. Mixed veggie kabobs look amazing, but they are difficult to manage because the vegetables cook at different rates–tomatoes will split before the zukes have even realized they’re getting warm. I think that nice big hunks of veggies cook more evenly when placed directly over the heat, but that it’s worth using skewers for mushrooms and tomatoes, or any other small vegetables likely to break up on the grill. Screw bamboo. Politely, of course.

Arm yourself with a long pair of tongs and a spatula and dinner is yours in about 15 minutes. Your ol’ dad will love it, too.

Keeping Passover in Uzbekistan

Keeping Passover in Uzbekistan is…a challenge. It should come as no surprise that Manischewitz and Streit’s don’t have local factories, so getting a hold of the Passover products we’ve learned to rely on in the U.S. is a bit of a challenge. Last year I asked my mom to send us a care package of key items, such as matzo meal, cake meal, potato starch, and a few other goodies. She also sent us a giant 5-pack of matzos, and I’ll confess that we still have a couple boxes tucked away somewhere. I’m fairly certain that a) you’re supposed to buy new products each and year, and b) 1-year old matzo-based foods can’t really get any staler than they were the day they arrived last March, so I’m not going to worry about a).

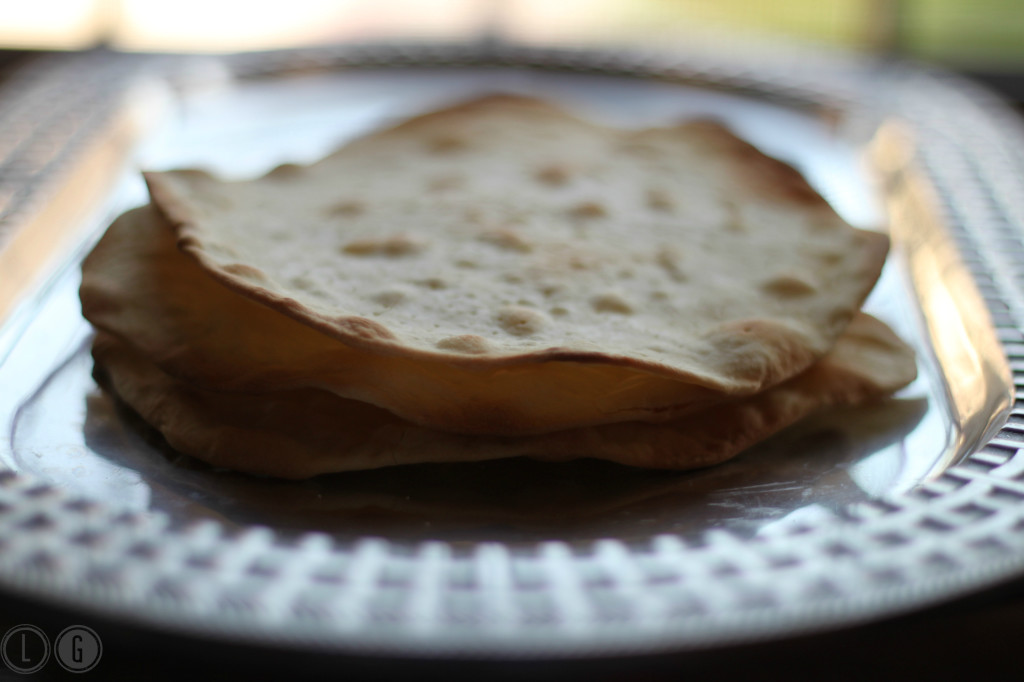
Instead, I’m going to share the greatest discovery we made in preparing for Passover last year: homemade matzo. With the absence of kosher-for-Passover products, keeping Passover here is somewhat more symbolic than serious, so obviously these matzo aren’t strictly kosher. I believe that they can be made in a strictly kosher manner, but I’d have to refer you to your rabbi for advice on that one! It’s impossible for me to describe the flavor of these matzo, except to say that they taste both fresh and flavorful, and nothing at all like the dry, cardboard-like typical boxed matzo. This recipe originally appeared in the The New York Times.

Matzo WM.jpg

Olive Oil Matzo by Mark Bittman

2 cups flour

1/2 teaspoon salt

1/3 cup olive oil

Sea salt, optional.

1. Heat oven to 500 degrees. Put flour, salt and olive oil in a food processor. Once machine is on, add 1/2 cup water. Continue to run machine until dough forms a firm ball, rides around on blade and is not at all sticky. (If you prefer, whisk together the water and oil and add this to machine all at once.)

2. Cut dough into 12 small balls — this is easiest if you cut the ball in half, then half again, then into thirds — and flatten each into a 3- to 4-inch patty. On a well-floured surface, use a rolling pin to roll each patty into a 6- to 8-inch circle. The shapes can be irregular, but dough should be so thin you can almost see through it.

3. Put dough on ungreased cookie sheets, sprinkle with sea salt if you like, and bake for about 2 to 3 minutes, keeping a very close eye on breads — they can burn very quickly. Once they begin to puff up and brown, flip and cook for another minute or so on second side. Repeat with all the dough and let cool completely.

Yield: 12 servings.

La-la-la-la Labneh!

Spring is upon us here in Uzbekistan. The spring holiday Navruz (which translates to New Day) is nearly here, coming with the equinox. Next Monday Passover will be here, and then Easter. Spring is definitely springing!

For us, the arrival of Passover always means shifting the way we eat. It’s not just about forgoing bread and other leavened products, but it’s also about exchanging the heavier comfort foods of autumn and winter for the fresh, crisp spring produce appearing in the markets.

I started my seasonal change of eating last week, after our return from three weeks abroad. For me travel is never a time for dieting, and we ate very well everywhere we went. So well that I was feeling a bit overfull and sluggish once we returned, and I decided it was time to think about some fresh, healthy, and interesting meals.

One of the best meals we had on our trip was a late weekday breakfast at Ottolenghi, the brainchild of chef Yotam Ottolenghi. On our previous trips to London we’d missed going to the sitdown restaurant of this small local chain, despite the exhortations of our friend Linda and her daughter. They are both vegetarian, and while Ottolenghi has its fair share of meat on the menu, the chef’s creativity is really on show with the vegetarian dishes.
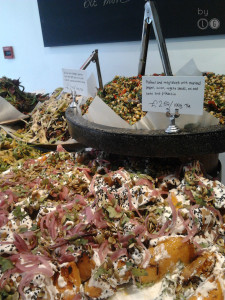
Ottolenghi salad

An array of salads at Ottolenghi.


We made it in just in time to still catch breakfast late on a Tuesday morning, and I spied my dish immediately: shakshuka. I could write reams about my adoration of shakshuka, which I first had deep in the Negev some seven or eight years ago. Shakshuka is an egg dish cooked over a slightly spicy tomato and pepper sauce. If you’ve ever had menemen in Turkey it’s very similar, but the eggs are sunny side up rather than scrambled into the sauce.

My dish arrived in the copper pan in which it had been cooked, and nestled on top of my eggs was a creamy dollop of labneh, the cheese made by straining the whey from yogurt. In Uzbekistan there is a very similar food known as suzma made from the strained local yogurt (which translates as “sour milk,” but it’s really quite delicious). I am never one to turn down cheese, or nearly any dairy product for that matter, and as I scooped my eggs and tomato sauce onto the generous slabs of toast, I added a little schmear of labneh, too. It was heavenly. Before we departed Ottolenghi we loaded up on goodies for our plane trip home that night, including a couple of vegetable salads and a little plum cake.


Shakshuka.jpg

Delicious breakfast shakshuka. With labneh!


That meal was the perfect punctuation to our trip, and the perfect transition into spring. We came home to temps in the 70s, but were met with a snowstorm the next day. Ah, spring! But despite the snow my memories of all those crazy salads stuck with me, and I started hatching a plan. Now each week I’m making an interesting salad that goes beyond the basics. Last week I made black bean and corn salad (not the most unusual, but it took a little creativity!), and this week I made a salad with chickpeas, carrots, cucumber, red pepper, and fragrant cumin-scented dressing. I’m actually a little bit excited about lunch today!

Since my reacquaintance with labneh/suzma, I’ve been buying out the plain yogurt at our local store. Every day last week, in addition to my spicy salad, I brought a little serving of homemade suzma dressed with a drizzle of olive oil and some za’atar spice and enjoyed it with a couple slices of the local black bread, tomatoes, and cucumbers. My delicious lunch drew interest, and I gave a little lesson on the making of labneh/suzma with local products.

I’m quite looking forward to the next couple of weeks when all the spring produce will start flooding the local bazars and meal prep will become ever more interesting!

Try Ottolenghi’s divine-looking recipe for labneh with olives and pistachios, via The Guardian. I don’t have access to goat’s yogurt, so I just use plain yogurt. I also strain my yogurt in the refrigerator–haven’t gotten brave enough to leave it out and straining for a full day.

16 oz. goat’s yogurt
16 oz. natural yogurt
Coarse sea salt
20 black olives, pitted
1½ tbsp roughly chopped fresh oregano
1 tbsp chopped parsley
Grated zest of 2 lemons
1 small garlic clove, crushed
1/3 cup olive oil
3/4 oz. pistachios, lightly toasted
3/4 oz. pine nuts, lightly toasted
½ tsp flaked chilli
3 ripe tomatoes
½ a small red onion, thinly sliced

Line a deep bowl with cheesecloth or muslin. In another bowl, stir the two yogurts and half a teaspoon of salt, pour into the cloth, bring together the edges to form a tight bundle and tie securely with string. Hang the bundle over a bowl, or over the kitchen sink from the tap, and leave for 24-36 hours. After this time, much of the liquid should have drained out and the remaining yogurt will turn thick and quite dry; the centre may still be creamy.

Remove the labneh from the cloth and transfer to a serving platter. Spread it over the plate with the back of a spoon, creating a loose, wavy pattern about 2cm thick.

Next, roughly chop the olives and put them in a bowl with the oregano, parsley, lemon zest, garlic and olive oil (reserving two tablespoons of the oil for the tomatoes). Use a pestle and mortar to crush the nuts roughly, leaving some just broken and others finely crushed. Stir into the olive mix, then spoon this over the labneh, leaving a border of about 2cm around the edge (if you want your labneh a bit milder, don’t use the whole quantity), then sprinkle with chilli.

Finally, cut the tomatoes into thick wedges and mix with the sliced onion. Arrange on a side plate next to the labneh, sprinkle with salt and drizzle with the reserved olive oil. Serve the labneh and tomatoes with torn chunks of bread.

What about you? Do you change your eating and cooking with the seasons? Where do you draw inspiration?