My Best Recipe: Butternut Squash Risotto

Squash blog

If ever asked, I would be hard-pressed to say what my very best recipe is, but this would be one of the handful that would leap to mind. In our foodie-obsessed culture it sometimes seems that the more retro or the more avant-garde a dish is, the more respect it commands. For me, the idea of a best recipe is one that is consistent, easy to remember, uses a handful of staple ingredients, and can be whipped together for weeknight dinner or easy weekend meals.

That’s exactly what risotto is for me. I’ve been making versions of this dish for about twenty years, adding flourishes to the basic recipe. This recipe is a best friend–it never lets me down, and picks me up when I need comfort. It’s hearty, savory, and there’s a zen to the process of making it.

One of our household favorites is pumpkin or butternut risotto. They both use the same basic recipe and take the same amount of time to make, but pumpkin from a can save a few prep steps and if you’re like us, there’s usually some in the pantry or freezer. This is a perfect fall recipe that can be made vegan or not, depending on your choice of stock and cheese.

Risotto with Butternut Squash or Pumpkin (adapted from Sundays at Moosewood Restaurant)

5 cups stock, vegetable or chicken

2 Tbsp. olive oil or butter, or a combinations of both (or sub some schmaltz for butter if you have it)

1 small yellow onion, finely chopped

1 1/2 cups arborio rice

1/2 small butternut squash, peeled and cut into 1/2″ cubes or 1 cup pumpkin puree

1/2 cup dry white wine

1/2 cup freshly grated Parmesan cheese

salt and pepper to taste

  1. Bring the stock to a boil in a medium saucepan. Lower the heat and maintain a simmer.
  2. Heat the oil and/or butter in a large, heavy saucepan on medium heat and saute the onion for 2 to 3 minutes, until translucent but not browned.
  3. Add the rice and stir for one minute to thoroughly coat the rice with oil, taking care not to break the grains.
  4. Add the wine and stir constantly until it is absorbed.
  5. If using squash, add the cubes followed by 1/2 cup of stock and stir until the liquid is absorbed.
  6. Ladle in the simmering chicken stock, 1/2 cup at a time, stirring after each addition until it is absorbed. It should take about 18 to 20 minutes to cook the rice. Reduce the stock added toward the end and increase the frequency, tasting for the point where the rice is tender but al dente.
  7. If using pumpkin puree, add the puree at the halfway point.
  8. Remove the risotto from the heat and stir in the grated cheese.

If you are vegan, this recipe is still delicious without the cheese, but will likely need a bit more salt to taste.

Either version is really lovely with a bit of sage or herbes de Provence, as well.

Figgy Fun with Confituras

Fig Collage Text final

Last month I met Stephanie McClenny, founder and creator of Confituras, at a class she taught on preserving peaches. Stephanie is the creative force behind the stunning array of jams, preserves, chutneys, and pickled fruits on offer at Austin’s farmers’ markets and specialty food stores. She uses only the freshest local fruits in her confitures, and the flavors are both traditional and unique.

As excited as I was to attend the peach class, I mentioned how sorry I was to have missed her earlier class on figs since I’ve always wanted to learn how to make fig jam or preserves similar to the ones my grandmother made from the figs that grew in her yard in Galveston. A few days later Stephanie turned me onto her upcoming class in concert with Jackie Letelier of Pâté Letelier, focusing on fig preserves and chicken liver pâté. I was sold in a minute. The results of our class were delectable–Paul and I ate them up in just a few days–and I reminisced about the homestyle versions of those foods made by my grandmother.

My Jewish grandmother, Gertrude Plantowsky, was a great cook, and her fridge was always stocked with schmaltz. Despite her kitchen aplomb, she wasn’t a patient teacher, so assisting her was a rare opportunity and I never really had a chance to learn some of her most special recipes. Despite being raised in a kosher home, one of her best dishes was crab and shrimp gumbo. At some point the Gulf seafood trumped her traditional upbringing.

Two others that were special and delicious were her chopped liver and her preserved figs. I did help out with the chopped liver once: my job was to grind the cooked livers and onion through her table-mounted meat grinder and it seemed like it took ages. But I never did get an insight into how she made her figs. I have trouble remembering exactly how they tasted, but my vague recollection is of figs preserved in syrup with lemon. I think they were sliced, or maybe halved. They were sort of jelly-like so you could spread them on toasted challah, but they weren’t chunky and seedy like preserves. One day I hope to figure them out.

Last weekend I tried, using the preserving experience from Stephanie’s peach class and the details I learned about figs from the pâté and preserves class, and set to work in the kitchen to preserve about two-and-a-half pounds of figs in syrup scented with lemon, cinnamon, and cardamom. The result was six half-pints of beautiful figs, and even though they aren’t quite like Gert’s, they are delicious.

Dinner at Eden East

eden East 2 edited


A few weeks ago Paul and I went to dinner at Eden East at Springdale Farm. Springdale is one of the urban farms on Austin’s eastside, and it’s well-known for the fantastic produce that comes from its tiny plot of less than five acres. We were enchanted by the picnic tables set under the huge tree, the creative menu that changes weekly, and the ducks wandering around the vegetable beds in the gathering dusk. I rather failed at getting beautiful photos of our food, but I hope I captured the ambience of this lovely place.

When I first saw the menu I was a bit concerned we’d be rolling out of the clearing, stuffed from so many courses of good food. A wonderful aspect of dining at Eden East is that your meal is self-paced. If you want to get up and walk around the farm for bit, feel free. If you want to spend a while enjoying the wines or beers you and your friends brought (there is no liquor license, but bring your own is welcome), indulge and sip away. The kitchen is accommodating of special diets, as noted by the special preparations for a vegan diner in the party next to us.

As we proceeded through the courses we kept saying, oh this is my favorite! In the end the Prickle Duck was our joint favorite, and while Paul loved the Smoky Wild Pig, I have to put the Weed Salad in second place. It seems that Deep Eddy is often on hand, creating a special a cocktail to go with the meal. The night was so warm, and their refreshing creation was most welcome. The peach crostata for dessert was a perfect seasonal way to end the meal, made extra special with a prickly pear popsicle served in a shot of vodka. I look forward to visiting Eden East again in the fall, when cooler temperatures and autumn produce will offer a completely different experience.

My First Food Publication! (umm, five years ago)

About five years ago I had my first piece of food writing published in the magazine PresenTense, put out by the innovative Jewish organization of the same name. The piece was part of an issue that looked at the ways young Jews were exploring issues concerning food in a day and age very different from that of our bubbes’ and zaydes’. My article focuses on the increasing inclusion of Sephardic (or Mediterranean) flavors into the standard American Jewish diet, and it seems especially timely now that the whole world has been swept under the influence of Yotam Ottolenghi and Sami Tamimi’s amazing cookbook Jerusalem. I didn’t have a food blog back then, so I couldn’t easily share it with everyone, unlike today.

It was a fun trip back in time to find this piece, and I hope you enjoy reading it, and maybe even eating it. I’m including the full recipe for Moroccan Salmon since the creative photo doesn’t quite capture all the ingredients. We make this recipe with some frequency, since we usually have all the bits and pieces in the house. It’s bright, flavorful, and it makes a stellar dinner party centerpiece if you double the recipe for a side of salmon, cooked whole.

Moroccan Salmon* (adapted from Cooking Light)

This recipe is filled with Mediterranean flavors. It’s easy to prepare if you have a good kitchen knife or a small food processor. This is beautiful for a holiday dinner, but easy enough for a weeknight if you use shortcuts.

1/2 cup chopped fresh flat-leaf parsley or cilantro

1 Tablespoon olive oil

2 teaspoons fresh lemon juice

1/2 teaspoon salt

1/4 teaspoon ground ginger

1/4 teaspoon ground red pepper (cayenne works well)

1/4 teaspoon ground cumin

1/4 teaspoon freshly ground black pepper

4 garlic cloves, minced

4 (6-ounce) wild-caught salmon fillets (about 1-inch thick)

Cooking spray

1 lemon

3 cups thinly sliced red bell pepper (frozen mixed bell peppers will work well)

2 tablespoons water

1 large plum tomato, cut crosswise into 1/4-inch-thick slices (or 1 can diced tomatoes, drained)

*other firm-fleshed fish works well in this recipe—let your taste buds and budget be your guide

Preheat oven to 400°.

Combine first 10 ingredients in 13 x 9-inch baking dish. Do not use an aluminum pan—it will react with the acid in the dish. Add salmon, spreading paste thickly over the fillets. Cover and let stand 15 minutes while you prepare the other ingredients. Remove salmon from dish, reserving paste in a medium bowl (you may need to scrape it gently off the fish). Rinse the 13 x 9-inch dish and coat with cooking spray. Place the salmon, skin side down, in the dish.

Cut lemon in half lengthwise; cut each lemon half crosswise into 1/8-inch-thick slices. Add the lemon slices, bell pepper slices, 2 tablespoons water, and tomato slices to the spice paste; stir gently to coat. Arrange lemon mixture in an even layer over salmon; cover with foil. Bake at 400° for about 20 minutes or until fish flakes easily when tested with a fork or until desired degree of doneness.

Top each fillet with about 1/2 cup vegetable mixture, and drizzle each serving with pan juices.

For an easy weeknight pairing, make a quick pot of couscous and toss some toasted pine nuts, almonds and pistachios on top.

A Girl and Her Tacos: Santa Monica

Rajas

A million years ago when I lived my L.A. life I had a favorite meal that was hard to come by: potato and rajas tacos at Border Grill in Santa Monica. As a poor grad student Border Grill was out of my reach except for the most special of occasions, so I bought the cookbook. It was my first brush with celebrity restaurants, and I felt as though I knew the chefs—Mary Sue Milliken and Susan Feniger—from the hours I spent watching their early Food Network show Too Hot Tamales. For the price of two orders of potato and rajas tacos I got my hands on the recipe. Today the tacos are off the menu in Santa Monica, but still available for a mere $3 each from the Border Grill food truck.

When we received our most recent CSA box from Johnson’s Backyard Garden I was flabbergasted by the haul of peppers we brought home. Our mix included a variety of sweet, or at least not hot, peppers, as well as about a dozen serranos. Some were long and red and pointy, others petite and light green with a distinct flavor, a handful dark green and tinged with red, and a few good old typical green baby bells. For nearly a week I regarded the veggie bowl on the counter each time I walked through the kitchen, confounded about how to use the immense variety.

As we wended our way through rush hour traffic to our aerials class in east Austin inspiration struck: rajas. Traditionally rajas are made with fire-roasted poblano peppers, sautéed with onions and finished with a touch of cream and cheese. Sometimes other delights sneak their way into the rajas mixture: potatoes (proven by my old favorite) and corn are popular guest stars. Since we’ve just barely moved back across the globe my old cookbook is still packed away somewhere, and with no cream on hand, I had to improvise. Once made, we layered the rajas mixture with a bit of shredded cheese and some homemade black beans topped off with a dollop of labneh into handmade corn tortillas. It was a simple dinner worthy of the memories from days gone by at Border Grill.

Quick Weeknight Rajas

1 Tablespoon vegetable oil
2 large bell peppers or their equivalent in poblanos or other mild peppers, thinly sliced
2 serrano peppers, seeds removed, thinly sliced (adjust to the heat level you prefer)
1 medium white onion, thinly sliced
2 cloves garlic, chopped
2 ears corn, kernels removed
Kosher salt

Add the oil to a heavy large skillet over medium-high heat. When the oil is hot, add the peppers, onion, and garlic and sauté until onions turn translucent. If vegetables stick, add a few tablespoons of water to deglaze the pan and continue to sauté. Add the corn and cook for an additional 3-5 minutes, or until corn kernels are crisp-tender. Remove from heat and season to taste with kosher salt.

Agua Fresca Obsessed

Watermelon obsessed

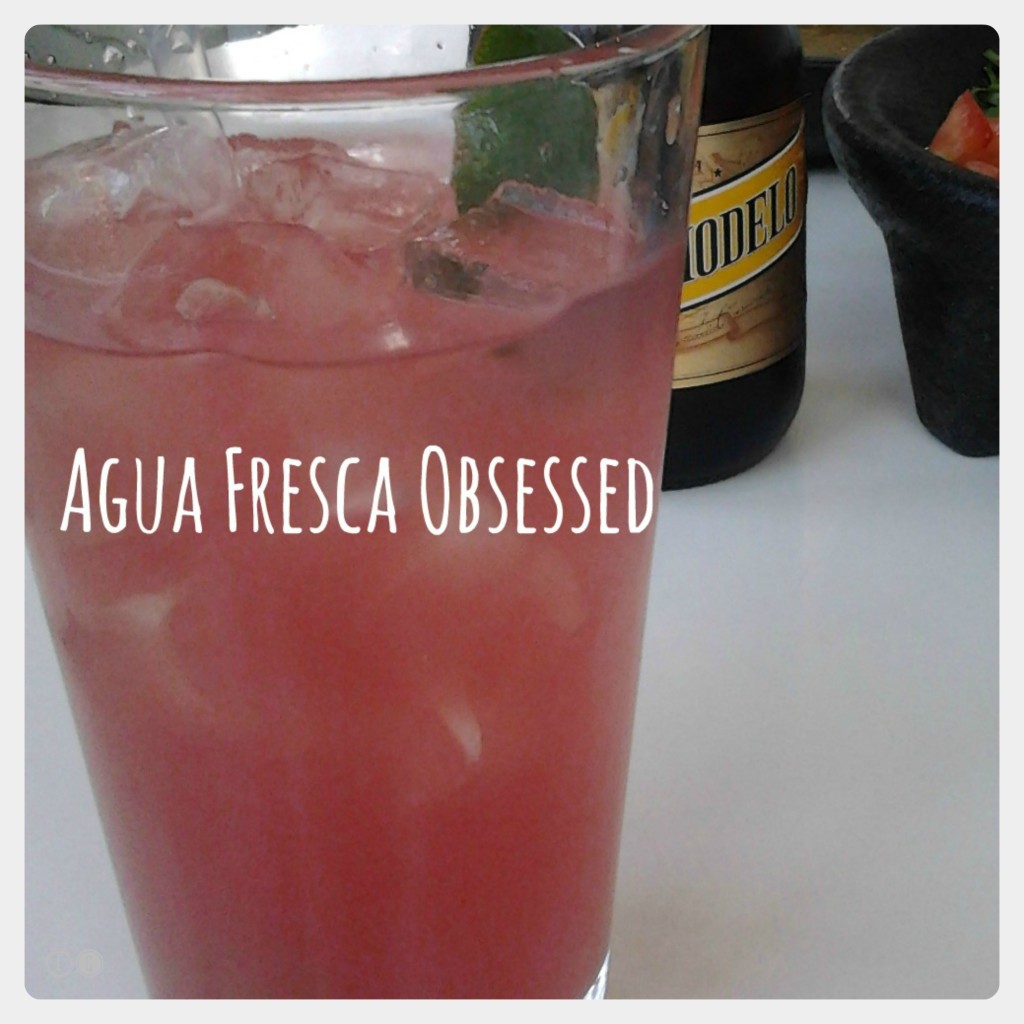
Sweet agua fresca from Zócalo in Austin, Texas

Real talk: aguas frescas are amazing and I’m admitting to a mild obsession. My love of the agua fresca really took off in Thailand of all places, where you can find tropical fruit “shakes” nearly anywhere for the high price of about 30 baht or $1. When I first saw “shake” on the menu I ordered with trepidation, the image of a creamy watermelon smoothie giving me pause. To my delight the shake that arrived was simply watermelon blended with ice and a bit of simple syrup, and with one sip I was hooked. Watermelon shakes followed, at least one per day for the next two weeks, interspersed with young coconuts because Thailand, people!

Having spent 80% of my life within 3 hours of the border with Mexico, I can’t help but think of a fresh, slightly sweet fruit water as anything other than an agua fresca no matter which continent serves it up. In Mexico we found the most common aguas frescas to be watermelon (sandía), pineapple (piña), hibiscus (jamaica), and a creamy rice-milk sort of beverage called horchata. And no, that’s not just a Vampire Weekend song, friends. These cold beverages with mystical live-giving properties may not be quite as inexpensive in Texas as they are in Thailand, but they are ubiquitous and refreshing in the sweltering 95+ degree heat of May.

So guys, what I’m trying to say is that when you’re drained from 2 hours of roller derby drills and you stop for a breakfast taco or two at El Chilito you also have to get an agua fresca de sandía. And then you have to realize that you can make some at home with all the leftover watermelon in the fridge from your blastalicious July 4th spectacular. Do it.

This recipe is from Whole Foods and it’s close to perfect. I cut the amount of water in half and doubled the lime juice since my delightful pink drink is sticking around in the ‘fridge for a day or two.

Watermelon Agua Fresca

Ingredients:
  • 8 cups watermelon, cut into 2-inch pieces (approximately 6 lbs.)
  • 1 cup cold water, divided
  • 2 tablespoons freshly squeezed lime juice
  • 1 tablespoon honey
  • Ice cubes
  • Lime slices and mint leaves for garnish (optional)
Method:

Cut the watermelon flesh from the rind. In a blender or food processor, process half the watermelon pieces with 1/2 cup of water until smooth. Pour through a strainer into a pitcher. Repeat the process with the remaining melon and water. You should end up with about 8 cups of juice. Stir in the lime juice and honey. Pour into ice-filled glasses and garnish with lime slices and mint.

Someday I’ll work out how to make horchata. Until then, enjoy Vampire Weekend and find a sidewalk to walk on.

[youtube]https://www.youtube.com/watch?v=MVpdi0bD6NA[/youtube]

A Day in the Life

Della Mae members Courtney Hartman and Kimber Ludiker make a new friend in Khiva. (U.S. Embassy photo)

Frequently people ask me what it was like to be a public diplomacy officer in the Foreign Service of the U.S. Department of State. “Hard,” is my off-the-cuff answer. My job as Information Officer, colloquially known as press attaché, included a number of key responsibilities:

  • Daily press briefings with the Ambassador and senior staff
  • Drafting press guidance and talking points on a variety of issues
  • Managing the Embassy’s social media strategy, important in a country with press restrictions
  • Identifying speakers for weekly outreach programs
  • Working with libraries and librarians to fund English-language materials
  • Traveling with the Ambassador on site visits throughout the country
  • Coordinating press events such as monthly press conferences and exclusive interviews with the Secretary of State
  • Creating media plans to promote educational and cultural programs in a country with press restrictions
  • Monitoring the on-the-ground situation for working journalists
  • Promoting information about the services of the Embassy’s consular section, including American Citizen Services and visa services for local citizens

There’s definitely more to the job, but that’s a pretty good start. As you can imagine, on any given day I might have other things come up, such as unconfirmed reports that the President of the country had a massive heart attack!


When I think back on my favorite aspects of the job, they definitely relate to promoting the cultural programs we worked so hard to present for the Uzbek public. During my time in Uzbekistan we had photographers, poets, basketball players, musicians, and dancers come to Tashkent and other cities for master classes, performances, competitions, and more. I had an amazing time traveling with our cultural envoys and coming up with interesting ways to share their work with the citizens of Uzbekistan.


The talented students of the Urgench arts kolej perform for arts envoy and photographer Frank Ward.


One of my most memorable experiences was the tour of bluegrass group Della Mae, an all-female bluegrass band that spent about a week in Uzbekistan. Della Mae came to Uzbekistan as part of the American Music Abroad program which is “designed to communicate America’s rich musical contributions to the global music scene as it fosters cross-cultural communication and people-to-people connection to global audiences.” Their openness to working with local musicians led to the spontaneous creation of a bluegrass/Uzbek folk fusion that we started calling “Blue-Uz-Grass.” They sang, gave master classes, jammed with local musicians, and performed a fantastic sold-out concert at one of Tashkent’s premier music halls. I had the pleasure of traveling with the group to the great Silk Road city of Khiva and to nearby Urgench where there’s an incredible performing arts high school, known locally as a kolej.


[youtube]https://www.youtube.com/watch?v=At9mDNHLW3g&list=TLFHU2Ny2uffM[/youtube]


My role with Della Mae’s visit was to coordinate social and traditional media coverage, put together a press conference and press preview performance, and to travel with the group to the kolej in Urgench where we’d had successful arts envoy programs in the past. We did a number of things to promote Della Mae on social media, from tweeting to posting tons of photos on Facebook, and sharing videos such as the one above through YouTube and the local video sharing site Mover.uz. The video you see above was posted to the Embassy’s YouTube channel–and it’s received over 400 views, despite the fact that YouTube is banned in Uzbekistan.

We live tweeted the event in three languages: English, Uzbek, and Russian:


We had a great team at the Embassy supporting this visit: the cultural affairs officer and cultural assistant did all the advanced planning to set up the program and supported the band while in country; our multi-tasking staff ran around with cameras to multiple sites to document all the fun (and work!); our  press assistants worked on media releases, interviews, and the press event; and our social media team collaborated to keep our Facebook and twitter communities involved in real time. All along the way we had a staffer from American Music Abroad offering even more social media amplification of the visit.

It was an exhausting week, but worth it in so many ways. I’ll leave you with one of the several Facebook albums we created to share Della Mae’s tour with a larger audience. Our roving photographers followed the band throughout their tour, capturing behind-the-scenes shots of the band working with other musicians, with students, and performing in master classes. This is just a snapshot of what they saw. You can see more if you “like” the U.S. Embassy’s Facebook page!


[fbalbum url=https://www.facebook.com/media/set/?set=a.10151495806909186.581651.9631659185&type=3]

A Father’s Day Grilled Feast

It’s barely mid-June, but deep in the heart of Texas it’s hot everyday and the locally-grown fruits and vegetables are rolling into the markets, tables groaning under the bounty of summer. With Father’s Day upon us, it was time to pick up corn, peppers, squash, tomatoes, and ‘shrooms and fire up the grill. We mighta’ sneaked a few chunks of chicken in there, too.

Grilling is nearly a state religion in Texas but, in my opinion, there’s no one way to do it rightly or wrongly. It takes a few decisions, a few key tools, a little bit of creativity, and an apron with a built-in bottle opener and koozie to keep you cool when facing the flames.

First decision: gas or charcoal. Down and dirty grillmasters and -mistresses swear by charcoal. For the last two years I grilled only on charcoal and it does have benefits, such as superior heat control and hot spots exactly where you want them. But all my recent grilling has been on gas, and what you give up in control is a trade-off for easier cleanup and possibly fewer carcinogens launched into the atmosphere.

Second decision: what to grill. I know folks swear by steaks and burgers as their grilling favorites, and while it’s hard to beat a beautifully caramelized piece of grilled flesh, vegetables take on a wholly new character when they come off the fire, delicately charred and bursting with flavor. Marinate them or not before sliding them over the flames, but do give a judicious coating of olive oil, salt, and pepper to minimize sticking and guarantee great flavor.

Third decision: direct or indirect heat. I’m definitely no expert on the benefits of direct and indirect heat for grilling meats, but when it comes to veggies I think that medium direct heat is best, and keep the grill lid closed! Not only will the food cook more efficiently, but you’ll also be rewarded with luscious grill marks and that smoky char. Place your larger, sturdier vegetables over the hottest spots of the grill, which tend to be right between two burners.

Fourth decision: skewers or not. When grilling vegetables I’m agnostic about skewers. Metal skewers do a bang-up job when grilling meat kabobs, since they conduct the heat through the center and help it to cook evenly. Mixed veggie kabobs look amazing, but they are difficult to manage because the vegetables cook at different rates–tomatoes will split before the zukes have even realized they’re getting warm. I think that nice big hunks of veggies cook more evenly when placed directly over the heat, but that it’s worth using skewers for mushrooms and tomatoes, or any other small vegetables likely to break up on the grill. Screw bamboo. Politely, of course.

Arm yourself with a long pair of tongs and a spatula and dinner is yours in about 15 minutes. Your ol’ dad will love it, too.

Travel Tips: Solid vs. Liquid Products

Lush products that are great for travel. Or are they?

Lush products are great for travel. Or are they? Photos by Lush.


Over the last two years we’ve traveled a lot. But on most trips we’ve been forced to check our luggage due to highly restrictive carry-on requirements imposed by our long-time air carrier of choice: Uzbekistan Airways. I mean choice with a bit of wink and nudge, mostly because Uz Air was just about the only carrier we could fly internationally while we were posted in Tashkent, and they had a very serious 8kg carry-on restriction. As a result, even our smallest carry-on suitcase had to be checked, despite the fact that most flights were less than 50 percent full and there was a ton of available space in the overhead bins. While it wasn’t always convenient to wait for luggage after a flight (Tashkent International Airport, I’m looking at you), it was nice to be able to pack a sufficient amount of toiletries for a two-to-three week trip.

Adapting to carry-on only travel has been a bit challenging. On our first domestic US flight we were held up at the TSA checkpoint in Houston because Paul packed his Leatherman tool in his carry-on. Um, no, that’s not allowed through security, my friends. His excuse for the oversight? That he’d been packing it in his small suitcase on every trip for the last two years, so he just did what came naturally. He also forgot to pack his dopp kit on that trip, but that’s a story for another day. Figuring out how to get all the lotions and potions into containers less than 100ml that all fit in a quart-sized bag should be second nature after more than a decade of such restrictions, but somehow the magic still eludes.

So of course I was thrilled to read about Lush’s solid shampoos, conditioners, and soaps as I was looking for product alternatives for our nearly three-week jaunt across Mexico. I’ve enjoyed a variety of Lush products over the years, especially their bath bombs (most of them, anyway. One day ask me about the one that left seaweed sludge all over the tub. Ick.). A few days before our trip Paul, my sister Cheryl, and I headed to the only Lush outlet in Houston, located at the Macy’s in the Galleria. Like most Lush shops, the space was small, but packed with the usual wonderful variety of products and scents.

We honed in on the solid products and spent a good ten minutes with one of the associates who explained the various options for shampoo, soap, lotion, conditioner, and toothpaste. We sniffed and rubbed and washed and lotioned and finally settled on the quintet of products you see in the photo collage. I’ll leave you to check out Lush’s site for specific ingredient details, but here’s a quick and dirty (ha!) review of the stuff we’re traveling with.

From top left:
Peace Massage Bar ($13.95 for 2.3 oz.): This lotion bar smells divine, and it was tough for us to choose which of the massage and lotion bars to take. I loved the fragrance mix, but Paul found it a bit overpowering. It melts beautifully into the skin, leaving a soft sheen once it’s rubbed in. However, it isn’t long-lasting at all, and in less than a week we’d used more than half of it. I’ve been conserving it and bought a small pot of Nivea at the local supermarket. For the price, I wouldn’t buy this product again to use as a lotion since it runs down so quickly.

Dirty Toothy Tabs ($4.95 for 20): These have been a fantastic surprise. Two boxes of these tablets take up about as much space as a travel-sized tube of toothpaste and don’t count against your quart-sized baggie of liquids and gels. While I don’t think that this variety tastes like mint, as advertised, the tabs do foam up nicely and clean the teeth well with a mixture of baking soda and neroli oil. They lack fluoride, which is okay for relatively short-term travel. The taste takes some getting used to, but I would absolutely buy these again for travel.

Trichomania Shampoo Bar ($9.95 for 3.5 oz.): This shampoo bar is for coconut lovers! Paul and I both tend to have slightly dry hair, so we asked for the most moisturizing shampoo in their shop. The coconut scent is sweet but not overwhelming, and the lather is rich and creamy. I’ve actually used the lather as body soap on the days I wash my hair because there’s a lot of it and it doesn’t seem to make my skin dry. This is the longest-lasting bath product we purchased, and our chunk of the bar is still going strong after two weeks. It’s also worked well for quick clothes-washing, just a quick swipe over the garment to be washed. With all that we’ve used about 1/4 to 1/3 of it. I won’t need to buy more before our next travel, but if I did, I would definitely buy this again.

Honey I Washed the Kids Soap Bar ($7.95 for 3.5 oz): This soap has a sweet, subtle honey scent, and comes complete with a little edge of beeswax straight from the hive. As much as I love the scent of this soap, we used it up very quickly (hence I’m washing with the Trichomania). It’s not a very dense product, and despite carefully conserving the bar in a soapdish that closes, it just doesn’t have much staying power. I would not buy this again (despite the heavenly scent) and I’d opt for a bar of Dove or Caress in the future.

Jungle Conditioner ($8.95, 2 oz.): Despite how short our hair is, Paul and I both like to use a bit of conditioner. This conditioner bar has a nice scent, though it’s a bit heavy on the sandalwood. Unfortunately, like the Honey I Washed the Kids soap, this bar disappeared pretty quickly. After reviewing the Lush site, it seems we may have been overusing it. It doesn’t make your hair slick the way liquid conditioner does. In fact, it’s quite hard to even sense that it’s on your hair while it’s wet, but it does work as advertised. I might buy this one again to see if more judicious use still gives a good result.

To protect all your goodies, Lush also sells aluminum containers sized for the products. They are lightweight and the product fits perfectly into them. It’s nice that they are made from a recyclable material, and even if you choose not to refill it with a Lush product, it makes a good travel accessory or mini container.

Overall I like the Lush solid products, but I’m not convinced that they are the perfect solution for travelers. However, just freeing up the space that shampoo and toothpaste take up makes a huge difference for me. Even though all of the products weren’t wins for travel, I did enjoy using all of them!

3 Unique Spas: Las Vegas, Khaolak, Istanbul

20130515-225303.jpg

When vacation time is at a premium what better way to maximize relaxation than with a day at the spa? On hitting your destination, an aromatherapy massage can be just the thing to help ease the transition from our 24/7 connected lifestyle. Before you depart, a luxurious, pampering treatment might help pave the way back to civilization and leave you with a sense of well-being that lasts long after the vacation ends. The average spa treatment might not be all-powerful, but a well-timed spa visit often provides the oasis of calm we need from time to time. Here are three unique spas and treatments to soothe body, mind, and spirit.

Canyon Stone Massage at Canyon Ranch Las Vegas

The Canyon Ranch Spaclub is nestled between the Venetian and Palazzo hotels, but it’s a world away from the garishness that marks so much of Las Vegas. The large spa never feels crowded, and the public areas are soothing and calm. Cell phones and electronics are banned throughout the facility, even in the locker rooms. A salt grotto in the co-ed public area and the herbal laconium in the women’s spa are two unique offerings, complemented by the usual steam room, Finnish sauna, and hot tub. During the 80-minute stone massage the therapist uses heated, smooth river rocks to work into the muscles of the back, arms, and legs, and even gives a little attention to the tummy. Toward the end she places cool stones between the toes and finishes the treatment with a gentle face massage. With numerous attendants, plenty of relaxation areas, and high-quality toiletries, this spa excels on details, as well.

Thai Massage and Pedicure at Khaolak Bhandari Spa, Khaolak, Thailand

The beachside town of Khaolak has no shortage of lovely, affordable hotels with spas, and as in most Thai beach towns there are inexpensive massage huts and shops everywhere. Set deep in the Khaolak Bhandari Resort, the Bhandari Spa is surrounded by fountains and makes the most of its lush, tropical location. While many treatments are offered in private rooms, the main treatment area for Thai-style massage, pedicures, and foot massage is located in an open pavilion where several patrons receive their services at the same time. On arrival, after crossing the bridge over a lily pond, each guest is offered a refreshing iced tea and a cool towel. This ritual marks your entry into the serene beauty of the spa. Those receiving a treatment in the pavilion change into comfortable fisherman-style pants and a loose linen top and then take their place on a thick, cushioned mat. Afternoon treatments are often accompanied by a rainstorm, and the cool breeze and patter of raindrops enhances the deeply relaxing environment. While the Bhandari Spa doesn’t offer complimentary steam rooms or hot tubs, it offers an incredible environment and the legendary smiling Thai customer service. All services end with a steaming cup of ginger-honey tea, enjoyed on a deck overlooking the spa’s gardens and lily pond.

Zevk-i Sefa at Ayasofya Hurrem Sultan Hamam, Istanbul, Turkey

The Ayasofya Hamam boasts a magnificent location: directly between the Blue Mosque and the Ayasofya in the Old City of Istanbul. It’s in just the right place for an early evening treatment after a long day of sightseeing. Built in the 16th century by the renowned architect Sinan, this Turkish bathhouse boasts the traditional treatments with a modern twist, all offered in a beautifully restored marble bath with stunning domes overhead. The traditional Turkish bath involves bathing with hot water poured from golden bath bowls, resting on a heated marble slab for about 20 minutes, and the famous scrubbing using a rough silk mitt. It’s not for the demure, as your bath attendant gets up close and personal with everything. A rich bubble wash and gentle soap massage complete the experience. At Ayasofya you can add even more luxury, and the Zevk-i-Sefa also includes a full body clay mask (complete with another bubble wash), and a luxurious oil massage given in a private area near the top of the bathhouse dome. Watching the late afternoon light transition from light blue to deep navy through the pinholes glass in the dome is relaxing all on its own.

Photo: Hurrem Sultan Hammam, courtesy of Satayman, via Wikimedia Commons

Keeping Passover in Uzbekistan

Keeping Passover in Uzbekistan is…a challenge. It should come as no surprise that Manischewitz and Streit’s don’t have local factories, so getting a hold of the Passover products we’ve learned to rely on in the U.S. is a bit of a challenge. Last year I asked my mom to send us a care package of key items, such as matzo meal, cake meal, potato starch, and a few other goodies. She also sent us a giant 5-pack of matzos, and I’ll confess that we still have a couple boxes tucked away somewhere. I’m fairly certain that a) you’re supposed to buy new products each and year, and b) 1-year old matzo-based foods can’t really get any staler than they were the day they arrived last March, so I’m not going to worry about a).

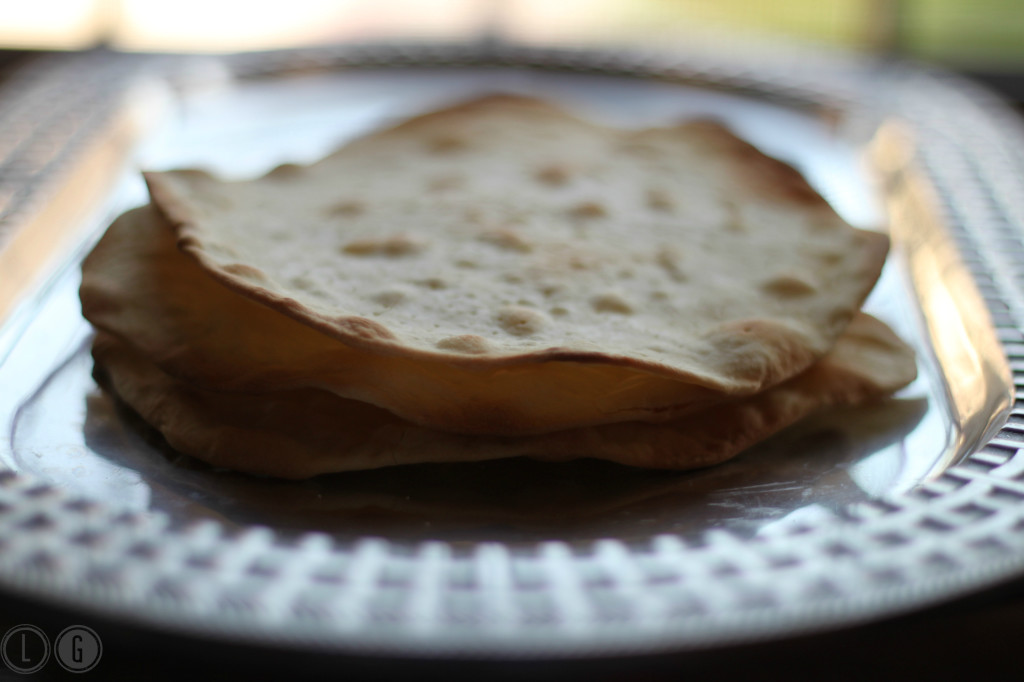
Instead, I’m going to share the greatest discovery we made in preparing for Passover last year: homemade matzo. With the absence of kosher-for-Passover products, keeping Passover here is somewhat more symbolic than serious, so obviously these matzo aren’t strictly kosher. I believe that they can be made in a strictly kosher manner, but I’d have to refer you to your rabbi for advice on that one! It’s impossible for me to describe the flavor of these matzo, except to say that they taste both fresh and flavorful, and nothing at all like the dry, cardboard-like typical boxed matzo. This recipe originally appeared in the The New York Times.

Matzo WM.jpg

Olive Oil Matzo by Mark Bittman

2 cups flour

1/2 teaspoon salt

1/3 cup olive oil

Sea salt, optional.

1. Heat oven to 500 degrees. Put flour, salt and olive oil in a food processor. Once machine is on, add 1/2 cup water. Continue to run machine until dough forms a firm ball, rides around on blade and is not at all sticky. (If you prefer, whisk together the water and oil and add this to machine all at once.)

2. Cut dough into 12 small balls — this is easiest if you cut the ball in half, then half again, then into thirds — and flatten each into a 3- to 4-inch patty. On a well-floured surface, use a rolling pin to roll each patty into a 6- to 8-inch circle. The shapes can be irregular, but dough should be so thin you can almost see through it.

3. Put dough on ungreased cookie sheets, sprinkle with sea salt if you like, and bake for about 2 to 3 minutes, keeping a very close eye on breads — they can burn very quickly. Once they begin to puff up and brown, flip and cook for another minute or so on second side. Repeat with all the dough and let cool completely.

Yield: 12 servings.

La-la-la-la Labneh!

Spring is upon us here in Uzbekistan. The spring holiday Navruz (which translates to New Day) is nearly here, coming with the equinox. Next Monday Passover will be here, and then Easter. Spring is definitely springing!

For us, the arrival of Passover always means shifting the way we eat. It’s not just about forgoing bread and other leavened products, but it’s also about exchanging the heavier comfort foods of autumn and winter for the fresh, crisp spring produce appearing in the markets.

I started my seasonal change of eating last week, after our return from three weeks abroad. For me travel is never a time for dieting, and we ate very well everywhere we went. So well that I was feeling a bit overfull and sluggish once we returned, and I decided it was time to think about some fresh, healthy, and interesting meals.

One of the best meals we had on our trip was a late weekday breakfast at Ottolenghi, the brainchild of chef Yotam Ottolenghi. On our previous trips to London we’d missed going to the sitdown restaurant of this small local chain, despite the exhortations of our friend Linda and her daughter. They are both vegetarian, and while Ottolenghi has its fair share of meat on the menu, the chef’s creativity is really on show with the vegetarian dishes.
Ottolenghi salad

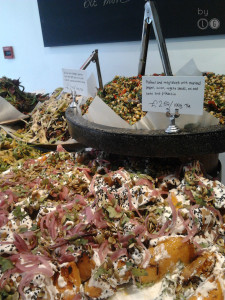
An array of salads at Ottolenghi.


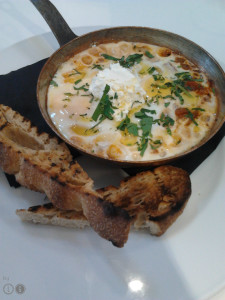
We made it in just in time to still catch breakfast late on a Tuesday morning, and I spied my dish immediately: shakshuka. I could write reams about my adoration of shakshuka, which I first had deep in the Negev some seven or eight years ago. Shakshuka is an egg dish cooked over a slightly spicy tomato and pepper sauce. If you’ve ever had menemen in Turkey it’s very similar, but the eggs are sunny side up rather than scrambled into the sauce.

My dish arrived in the copper pan in which it had been cooked, and nestled on top of my eggs was a creamy dollop of labneh, the cheese made by straining the whey from yogurt. In Uzbekistan there is a very similar food known as suzma made from the strained local yogurt (which translates as “sour milk,” but it’s really quite delicious). I am never one to turn down cheese, or nearly any dairy product for that matter, and as I scooped my eggs and tomato sauce onto the generous slabs of toast, I added a little schmear of labneh, too. It was heavenly. Before we departed Ottolenghi we loaded up on goodies for our plane trip home that night, including a couple of vegetable salads and a little plum cake.
 

Shakshuka.jpg

Delicious breakfast shakshuka. With labneh!


That meal was the perfect punctuation to our trip, and the perfect transition into spring. We came home to temps in the 70s, but were met with a snowstorm the next day. Ah, spring! But despite the snow my memories of all those crazy salads stuck with me, and I started hatching a plan. Now each week I’m making an interesting salad that goes beyond the basics. Last week I made black bean and corn salad (not the most unusual, but it took a little creativity!), and this week I made a salad with chickpeas, carrots, cucumber, red pepper, and fragrant cumin-scented dressing. I’m actually a little bit excited about lunch today!

Since my reacquaintance with labneh/suzma, I’ve been buying out the plain yogurt at our local store. Every day last week, in addition to my spicy salad, I brought a little serving of homemade suzma dressed with a drizzle of olive oil and some za’atar spice and enjoyed it with a couple slices of the local black bread, tomatoes, and cucumbers. My delicious lunch drew interest, and I gave a little lesson on the making of labneh/suzma with local products.

I’m quite looking forward to the next couple of weeks when all the spring produce will start flooding the local bazars and meal prep will become ever more interesting!

Try Ottolenghi’s divine-looking recipe for labneh with olives and pistachios, via The Guardian. I don’t have access to goat’s yogurt, so I just use plain yogurt. I also strain my yogurt in the refrigerator–haven’t gotten brave enough to leave it out and straining for a full day.

16 oz. goat’s yogurt
16 oz. natural yogurt
Coarse sea salt
20 black olives, pitted
1½ tbsp roughly chopped fresh oregano
1 tbsp chopped parsley
Grated zest of 2 lemons
1 small garlic clove, crushed
1/3 cup olive oil
3/4 oz. pistachios, lightly toasted
3/4 oz. pine nuts, lightly toasted
½ tsp flaked chilli
3 ripe tomatoes
½ a small red onion, thinly sliced

Line a deep bowl with cheesecloth or muslin. In another bowl, stir the two yogurts and half a teaspoon of salt, pour into the cloth, bring together the edges to form a tight bundle and tie securely with string. Hang the bundle over a bowl, or over the kitchen sink from the tap, and leave for 24-36 hours. After this time, much of the liquid should have drained out and the remaining yogurt will turn thick and quite dry; the centre may still be creamy.

Remove the labneh from the cloth and transfer to a serving platter. Spread it over the plate with the back of a spoon, creating a loose, wavy pattern about 2cm thick.

Next, roughly chop the olives and put them in a bowl with the oregano, parsley, lemon zest, garlic and olive oil (reserving two tablespoons of the oil for the tomatoes). Use a pestle and mortar to crush the nuts roughly, leaving some just broken and others finely crushed. Stir into the olive mix, then spoon this over the labneh, leaving a border of about 2cm around the edge (if you want your labneh a bit milder, don’t use the whole quantity), then sprinkle with chilli.

Finally, cut the tomatoes into thick wedges and mix with the sliced onion. Arrange on a side plate next to the labneh, sprinkle with salt and drizzle with the reserved olive oil. Serve the labneh and tomatoes with torn chunks of bread.

What about you? Do you change your eating and cooking with the seasons? Where do you draw inspiration?
Travel Blog Spotlight: Her Packing List

I haven’t quite gotten a blogroll or list of links I love together, but I thought I’d start a series spotlighting travel (and food) blogs I love. Today’s entry is Her Packing List. As the title indicates, it’s a website dedicated to helping female travelers pack their bags and get on the road. I have to admit that this blog won me over with post titles such as A Packing List for Girls with Ginormous Boobs. I promise this post will remain family friendly, despite that title :).

Her Packing List is such a well-organized site, offering readers easy-to-access information in a handful of categories: Packing Gear, Electronics, Clothing, Toiletries, Extra Bits, and Stories and Advice. While the blog does offer quite a number of product reviews by the contributors (who receive items free of charge for a fair and honest review), it also offers smart packing tips, how-tos, and ways to MacGyver your packing to keep it light and functional.

Resources for specific locales and itineraries. Great stuff!

One of the greatest features, though, is the “Ultimate Packing List for…” feature. Each list gives a destination, such as San Francisco, provides a brief overview of the destination and a list of suggested items to pack, from clothing to shoes and specialty items that might make life in that part of the world a little easier. There are packing lists for unusual trips, such as carnival in Brazil, and specialty lists and recommendations for vegan travelers, the aforementioned well-endowed chicks, and first aid items.

For those planning extensive travel and backpacking there is a fabulous collection of reviews of backpacks by their users. These are real reviews from the field on the features, benefits, and drawbacks of several commonly available backpack models. There are a handful of reviews of other luggage, bags, and packing resources.

Overall this site is easy to use and chock full of information. Even if you’re the greatest packer in the world, you’ll find a useful tip or idea on Her Packing List.

Favorite Stuff to Travel With

I’m not the lightest packer in the world, but I do OK. I have several gadgets I like to travel with, so I compensate by taking fewer clothes and shoes (and then usually buy something on the road, which is a baaaaad habit I should overcome!) to make room for the things that really matter. There are a few smaller items that I usually tuck in my suitcase or backpack because they almost always get used somewhere along the way, but some of these are the bulky bits that I rarely leave behind.

Morning reflection on the lake at Khao Sok, Thailand

Morning reflection on the lake at Khao Sok, Thailand

1. Canon Rebel T1i: For years we kept saying we were going to get a good camera and for years we kept putting it off. Around the fall of 2010 we started saving up Amazon giftcards to put toward the new camera, and by Christmas we had nearly 80% of the cost covered. This is the first dSLR we’ve owned, and it’s been a learning experience. But from the beginning I’ve been able to take some fairly decent photos, so it goes along on every trip, despite its bulk and heft. I’ve added a 50mm lens to the kit, as well.

2. iPad: A little secret? Somewhere along the way I transitioned from being a Mac girl to being a PC/Android girl. It happened after I poured coffee into my iBook at 5 a.m., but that’s another story. This summer I bought an iPad2 and I admit I’m still on a learning curve. I do hate that many sites don’t work too well on the iPad, and that I have frequent wifi connectivity problems, but the loads of free and low-cost apps that make travel easier make it worthwhile. I also use it as my primary reading device, having downloaded the nook and Kindle apps. And we’ve always got a few sitcoms loaded on it for downtime viewing.

3. Longchamp Le Pliage bag: These nylon bags fold up into little packets so you can tuck them into your bigger bag. They are also water-resistant, even on the bottom, so they are great on drizzly days. The medium-sized one is like a magic bag of holding–it seems much bigger on the inside than on the outside! I can get a camera, mini umbrella, wallet, iPad, and other bits and bobs in there. It’s a bit of a black hole sometimes, but overall a great bag. The drawback is that the corners fray after several months of use, which is frustrating because they aren’t exactly inexpensive.

4. Noise-cancelling headphones: I’ve had mine for going on 10 years, I think, and they are a bit worse for wear. They are also enormous and clunky and take up a ton of space. But they are invaluable on long flights, making music listening and movie watching far more enjoyable. Paired with some earplugs they also seriously cancel out the noise if you want to sleep. But they are bulky. Did I say they are bulky?

5. Unlocked cell phone: One of the great things about buying my cell phone overseas (a little Samsung Galaxy Gio) is that it’s already unlocked. When we travel I can just buy a new sim card with calling credit and data, and usually it’s activated right away. Easier to manage and smaller than the iPad, it’s just incredibly helpful when you’re in a new place. And it can help with translation when you’re stuck and need help expressing your needs with more than sign language.

I realize that this adds up to a hefty pricetag–all together it’s a couple thousand dollars worth of stuff. Bear in mind, I’ve acquired these items over the years and I’m a big fan of thinking in terms of cost-per-use. Apart from the headphones, I use everything on the list almost everyday. Which is probably why they are must-go essentials when I travel!

I travel with a few other “essentials,” so I’ll share more faves in the future. What are your go-to can’t-leave-the-house-without travel necessities?

Wondering Where to Wander

Although we’ve just returned from a trip, we find ourselves already thinking about the next one. Our suitcases aren’t totally unpacked yet and there are still piles of laundry to do, but instead we’re plotting and planning.

There are three places we’d like to hit before summer strikes: Rome, Barcelona, and Madrid. We’re trying to figure out if we can do it in 10 days without feeling too terribly pressed for time. Ideally we’d spend more time, but I think a week off work is all I’ll be able to manage. If we can work it out to include weekends and a weekday holiday then we might be in business!Continue reading