Serious Addiction

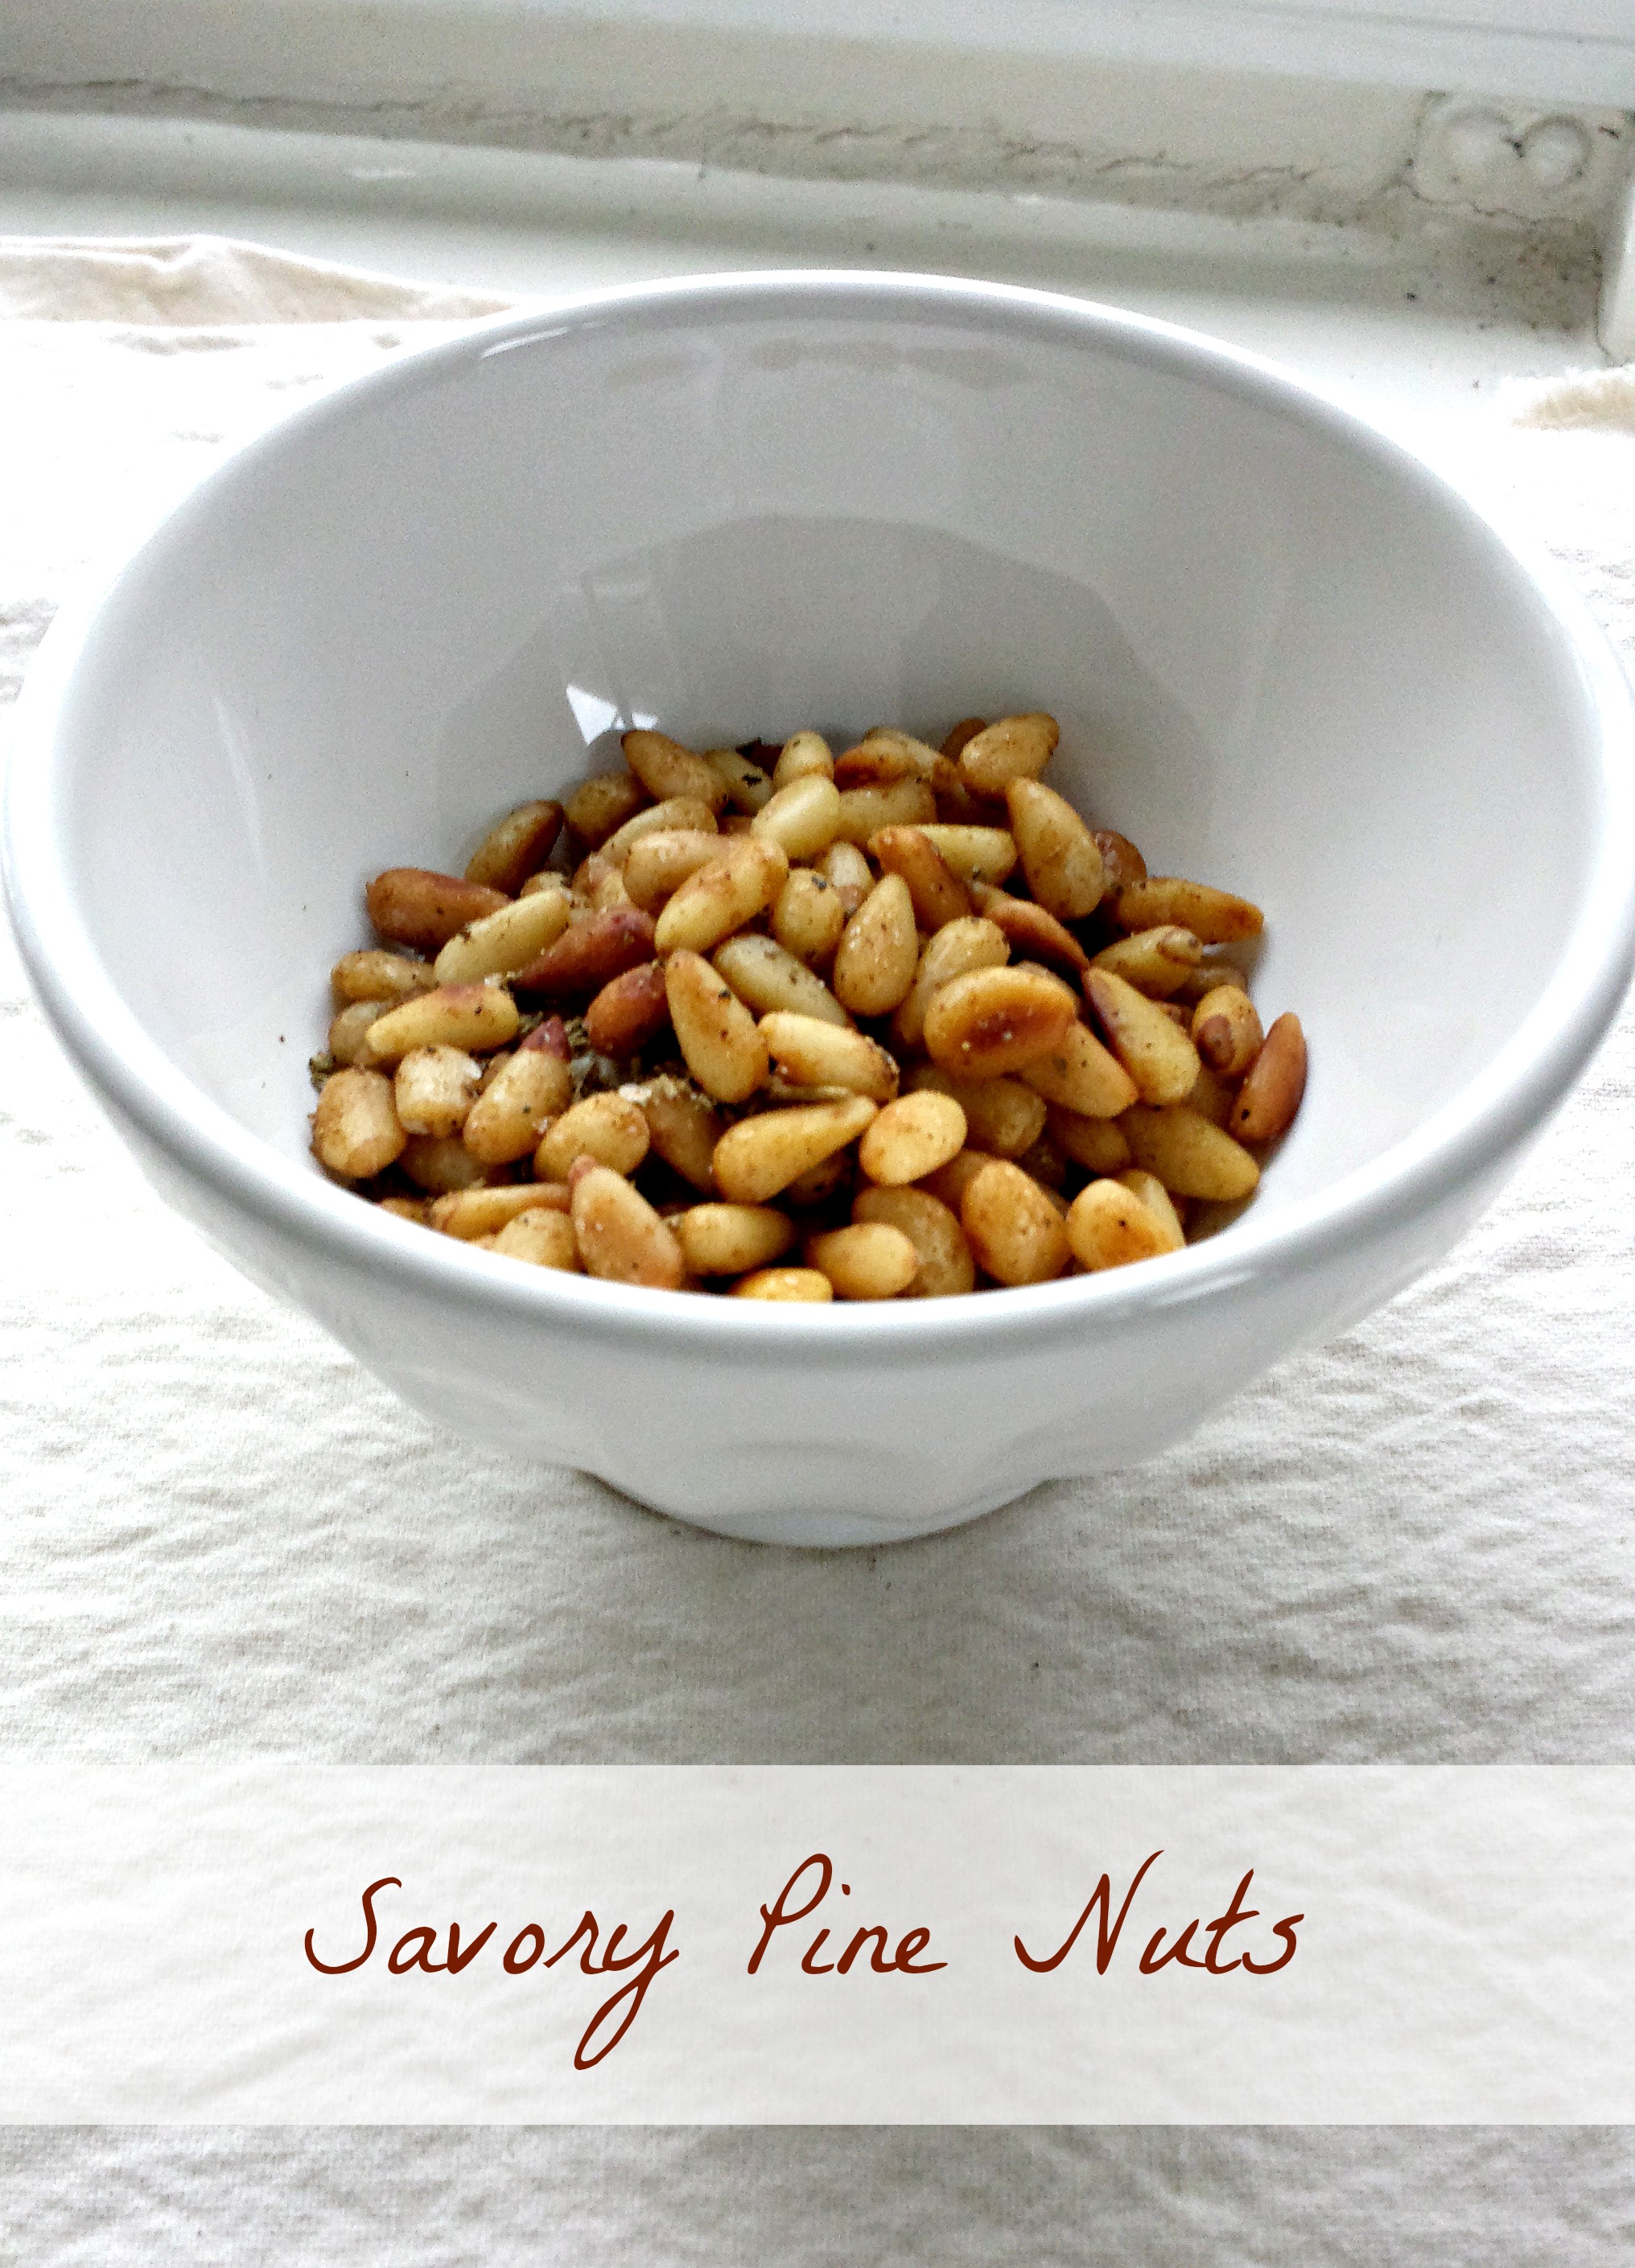
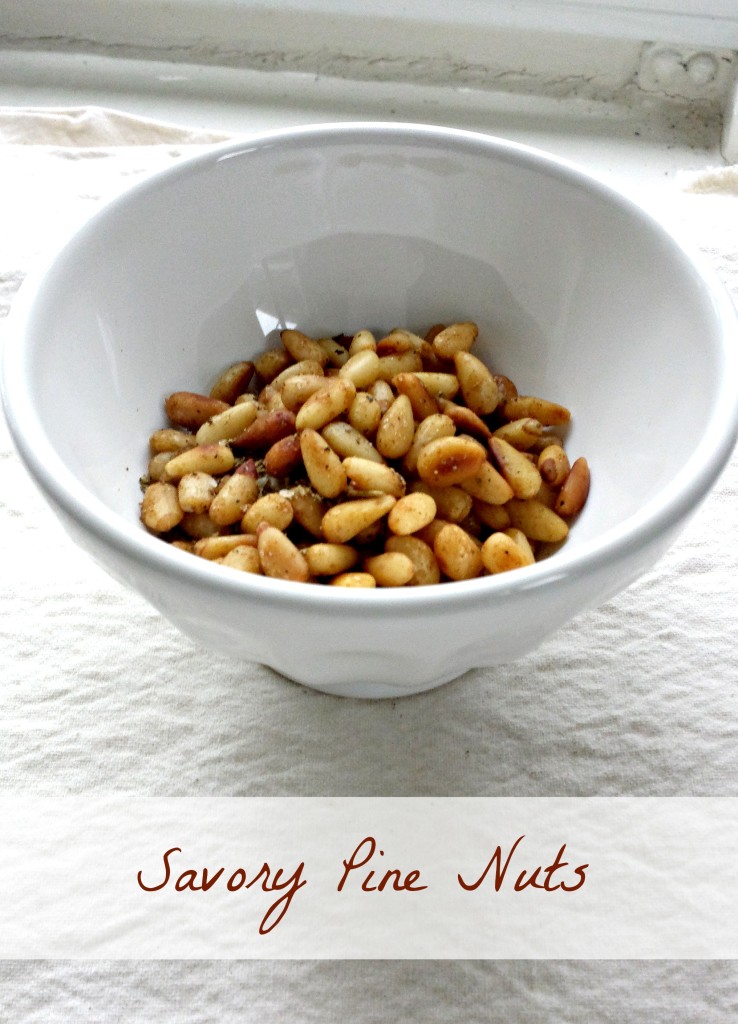
Savory Pine NutsI have a new addiction and I have to keep it out of sight, otherwise I’ll eat every last little bite.

The other day I mentioned the broccoli rabe recipe with pine nuts and lemon that I tested for Food52. I didn’t go into much detail, and I’ll share my notes after the contest the recipe is in moves forward. However, I’ve got to talk about the pine nuts.

Toasted pine nuts are yummy. They are an extra special crunch when tossed on a plate of hummus, and they give pesto its delicate richness, but on their own they don’t really excite me. That all changed with the addition of a splash of worcestershire sauce, some crushed dried rosemary, salt and pepper.

In all honesty, it sounded like a strange combination, and when I added the worcestershire to the freshly toasted nuts the aroma nearly knocked me out. I persevered, stirring until the moisture evaporated and the nuts retained the salty, umami hit of flavor. I tasted one and it was fine.

Little did I know how the flavor would continue to develop. The first night, when we had the greens, polenta, and chicken, the tasty little gems really perked up the polenta. Last night, as I put together a leftover plate I snagged a few pine nuts from the container and my taste buds lit up. They were like the most delicious, indulgent bar snack you could ever imagine. I could swallow handfuls down with some gluten-free beer.

Savory Pine Nuts (via Food52)

1/2 cup pine nuts
1 teaspoon Worcestershire sauce, or more, to taste
1/4 to 1/2 teaspoon freshly ground dried rosemary
1 large pinch of salt
Ground pepper, to taste

  1. In a dry skillet over medium heat, gently toast the pine nuts until light brown and fragrant.
  2. Remove to a small bowl, sprinkle on the rosemary and salt, and toss well.
  3. Drizzle the Worcestershire sauce slowly and carefully over the pine nuts. Toss well to coat.
  4. Add more salt and pepper to taste.

Foodie Find: Broccoli Rabe

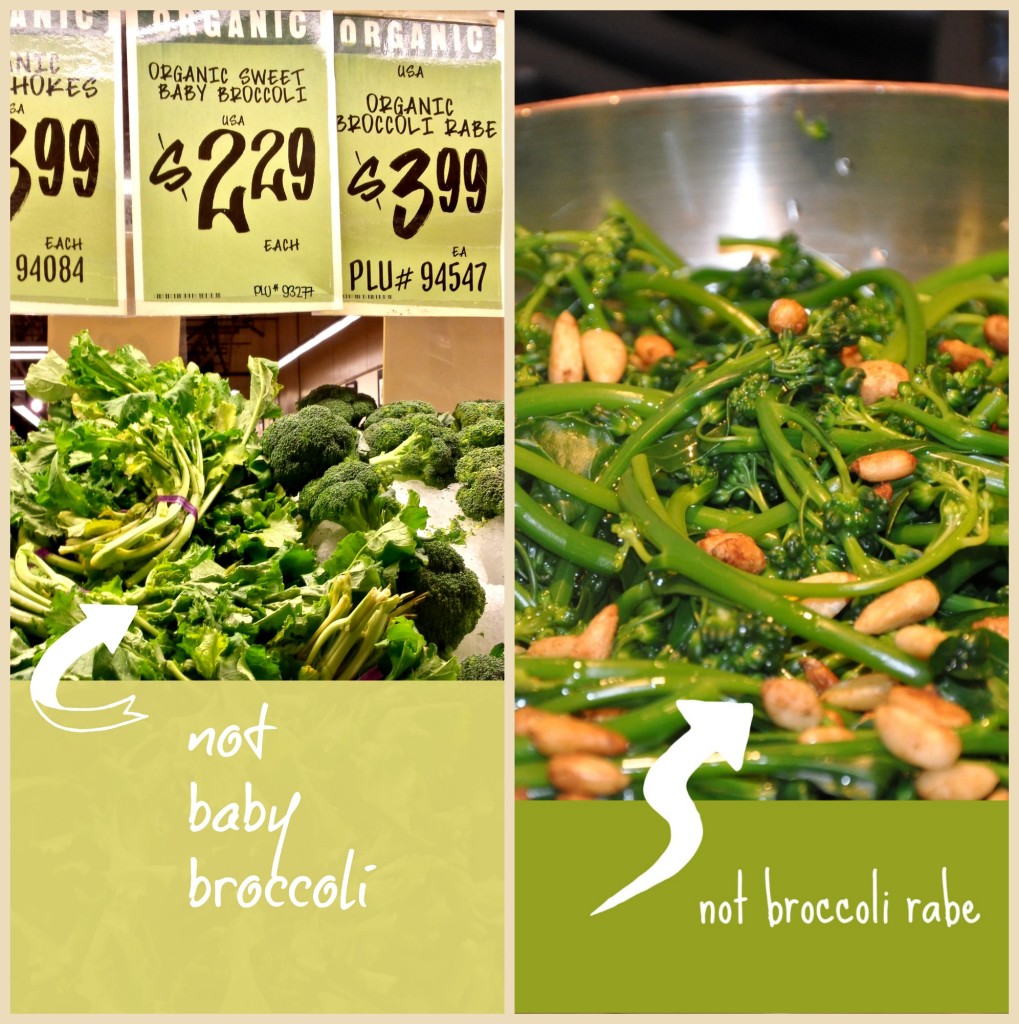
Broccoli rabe v baby broccoli

Left: my photo of the produce section, right: the recipe photo at Food 52

I am really into autumn greens this year, and despite the surfeit of kale and collards in my fridge at the moment, I volunteered to test a recipe in a Food52 recipe contest for Your Most Impressive Dinner Party Side featuring broccoli rabe. In the process of shopping for ingredients I learned a few things about broccoli, broccolini, and broccoli rabe. I thought I’d share, since I can’t really post my thoughts on the recipe until after I send them off to the Food52 editors.

As I’ve already established, Central Market is my favorite grocery store on the planet. I love shopping there and discovering new things, and to be honest I tend to ignore the whole broccoli/cauliflower/cabbage part of the produce section. Largely this is because they aren’t my favorite vegetables, and I find myself stonewalling when faced with the whole procedure of chopping a large head down to useable pieces.

Today I went looking for broccoli rabe and found myself totally confused, looking at the leafy greens that I thought were broccoli rabe which were displayed under a sign for organic sweet baby broccoli. Then I went to verify the ingredients on the recipe’s site, and that photo added to my confusion, since it seems to be baby broccoli, not broccoli rabe!

I did a quick spot of research and learned the following:

  • Broccoli rabe is part of the same genus as broccoli, but it’s more closely related to the turnip family
  • Baby broccoli, also known by the trademarked name broccolini, is not young broccoli, but is a cross between broccoli and Chinese kale
  • The “sweet baby broccoli” sign above refers to a different hybrid of baby broccoli, so it’s just another version of broccolini, but it’s definitely not young broccoli

I went ahead and made the recipe as written, using broccoli rabe rather than the baby broccoli pictured in the photo. I’ve had broccoli rabe at restaurants before, but this was my first time making it at home. I learned a few things, might not repeat some of them, and ended up with an overall pleasing dish.

If you’re looking to try broccoli rabe, look for the leaves and not the little florets. Notably, broccoli rabe doesn’t give off the cabbage-y aroma that so many cruciferous vegetables have. It’s fairly mild, slightly bitter, and not as toothsome as collards or kale can be. I recommend removing the tough stems as they are quite stringy, but using the soft stems along with the leaves. All the reputable recipes I’ve found have recommended blanching the broccoli rabe before sauteeing. I would substitute it in any favorite autumn greens dish.

Do you have a well-loved preparation that might be amazing with broccoli rabe?

Sunday Dinner

Chicken with polenta and broc edited(HDR)

We had a busy weekend with family from out of town and at least a portion of the Austin City Limits music festival, so I didn’t do my usual Sunday cooking. I made a lovely dinner, though, with a variation on Mark Bittman’s Mediterranean Chicken Thighs, some rich and cheesy polenta with garlic, and sauteed broccoli rabe with pine nuts and lemon. The pine nuts, toasted and seasoned with salt, rosemary, and worcestershire sauce, were amazing with the polenta and might be a new garnish for that dish.

Secret: I love roasting chicken thighs. They can be simply seasoned or made a little bit special with some fragrant herb paste layered under the skin. At 375 degrees they take just about 30 minutes in the oven, which is the perfect amount of time to make a salad and a quick side or two. And it’s just as easy to make a double batch, leaving lots of leftovers for cold lunches, chicken salad, or adding to soup or stew. And I save all the bones for making broth. Eventually.

Austin Eats at #ACL

Austin Eats header text

Hey, sorry for falling behind for a couple of days! We had some houseguests and related excitement, and since I’m trying to blog for #31days by the seat of my pants, I got a bit behind. The comeback starts now.

On Saturday we went the Austin City Limits music festival and overall we had a great day. One of the fun things about ACL is always the food. There’s an Austin Eats food court where all the vendors are locals–some are brick-and-mortar sites and some are food trucks. This year is the first time I’ve had to be super-careful about which foods to eat, and fortunately the festival organizers did a great job of noting which menu items were gluten-free. I’m not sure how the GF designation was made, but it turned out that there were other dishes not marked GF that were just fine and super delicious. My only complaint, and I know it’s a festival, is that the prices were so high relative to either the quality or the portion size. The best thing I put in my mouth all day was a sample of the Salt Potatoes from The Best Wurst. We only got one and devoured it, but when I tried to get some for dinner the line was so long I just didn’t have the patience. Which was the wurst decision I made all day. The small Yukon Gold potatoes are boiled in a salt brine and then slathered with butter and a sprinkling of green onions. It’s a veritable mouth party.

Austin Eats Highlights:

Daily Juice
Daily Juice had three different beverages on offer, including my favorite: watermelon. I love watermelon juice more than just about any other beverage and it took restraint to get only two servings throughout the day.

Daily Juice edited

The Peached Tortilla
The PT has several food trucks and they do a lot of catering, too. Their food is a bit of fusion with an Asian twist. Chinese, Japanese, and Thai flavors inform many of the dishes. Their GF offering at ACL was a Thai Summer Salad. I’m not sure exactly what I was expecting in terms of flavors, but for $7 I was expecting a larger portion. The salad base was shredded cabbage and other vegetables topped with what seemed to be a peanut sauce dressing, with a sprinkle of sesame seeds and maybe a few bits of peanut. I’m not a huge fan of peanut anything, so I probably should have asked when I ordered. Overall it was pretty tasty, but the size : price ratio was disappointing.

Hat Creek Burger Co.
Hat Creek is a local chain with a location just down the street from me. I’ve never eaten there because they serve burgers and I don’t really eat beef. So I was pleased to see that they had non-beef gluten-free options on the ACL menu. I had the Chicken Flashers (which sound kind of dirty–is it just me?) and the sweet potato fries. Great portion size, and though the fries were pretty standard, the chicken nuggets were quite good. I almost got over the fact that I couldn’t have a Mighty Cone.

Coolhaus
The ice cream sandwiches from Coolhaus melted too quickly to get a photo, but the gluten-free coconut-almond cookie was a perfect base for the salted chocolate ice cream. The cookie was similar to a macaroon (a real one, not those weird Manischewitz rocks) and I’m insanely grateful that Coolhaus had such a fantastic gluten-free option.

My dinner choice was incredibly disappointing, so much so I’m not even going to share it here. I wouldn’t patronize the vendor again, either at a festival or in the real world. But I did very happily snarf down another watermelon juice.

In case you were wondering how the omnivore husband did at ACL, he happily inhaled a bratwurst with all the fixings from The Best Wurst and some of my Hat Creek fries followed by a chocolate chip/salted chocolate Coolhaus ice cream sandwich. And for dinner he had a Chopped Beef Sandwich from The Salt Lick.

I know I should be writing about the music. We liked Haim, enjoyed Lissie and The Joy Formidable, had a nice hangout while jamming to Wilco, enjoyed our dinner to the sounds of The Mavericks, and relived our high school romantic angst to The Cure.

Sadly, our tickets were for the rained out weekend, which is having a terrible impact on the food vendors. There may be some pop-up events, but a full day’s prep for 75,000 expected attendees is potentially going to waste. If you’re in Austin and any of these food mentions tickle your fancy, consider visiting these vendors at their trucks or restaurants as they try to make up the losses from this weekend.

Foodie Find: Omission Beer

Omission beerThe last two batches of black beans I’ve made have been dry, by which I mean not drunken, and this makes me sad. For years I’ve been making my black beans with a healthy dose of Dos Equis, Negro Modelo, or Baltika and now I can’t. A friend mentioned gluten-free beers to me a couple weeks ago, and while I did a little looking online, I hadn’t yet made the step to finding any brews locally.

That all changed last night when I went on a shopping expedition to Central Market. We have houseguests coming and they are not at all gluten-challenged, so most of my shopping cart was filled with all the gluten. We have biscotti and cinnamon rolls and 47-grain bread and a raft of other things I can’t eat. But tucked in next to the gluten-full goodies was my six-pack of Omission lager.

Omission is apparently a gluten-free beer, but they seem very careful about tossing that term around. The beer is labelled as “crafted to remove gluten,” but like beers the world over, it starts with barley. Barley is one of the handful of grains that are kryptonite to those with celiac and gluten intolerance, so how can a beer made with barley be OK for us?

To be honest, I’m not 100% certain it is. The process Omission uses is guaranteed by independent testing to bring the gluten level in the beer down below 20 ppm, which has been the acceptable standard approved by the FDA. I’m new to all of this, and I’m not excited about the possibility of “glutening” an entire batch of beans. As a gluten-free or safe product, Omission seems to have more fans than detractors, based on online reviews. And the beer itself gets good marks for taste. I guess I could solve the mystery for myself and just kick back and drink a beer after work. But I’ll admit, I’m nervous about it.

Sometime in the next week I’ll make another pot of beans, I’ll add my beer and I’ll cross my fingers that Omission is the foodie find I hope it is.

My Best Recipe: Honey-Flax Granola

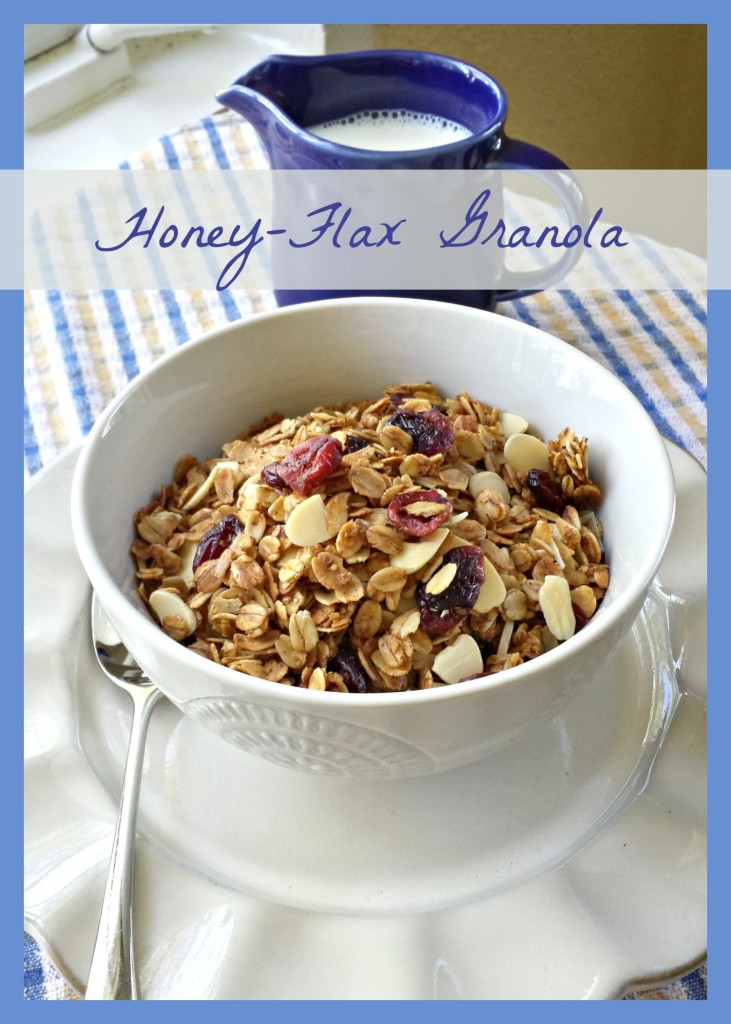
Honey-Flax GranolaMy Best Recipe is definitely becoming a series! If you haven’t read my original post, the idea of a “best recipe” is one that is consistent, uses just a handful of staple ingredients, is easy to remember, and comes together with a minimum of fuss. This granola recipe fits nearly all those requirements, but it does take a bit of attention to make sure it doesn’t go from toasted to roasted while you weren’t watching.

As I mentioned yesterday, when I first started making this recipe it was kosher for Passover, made with matzo farfel, which is essentially rolled oat-sized bits of matzo. The original recipe came from Streit’s Matzos, and it’s terrifically flexible for Passover and any time of year. For the record, the other recipes on the Streit’s site look a bit…odd, but the mandel bread recipe is gold standard.

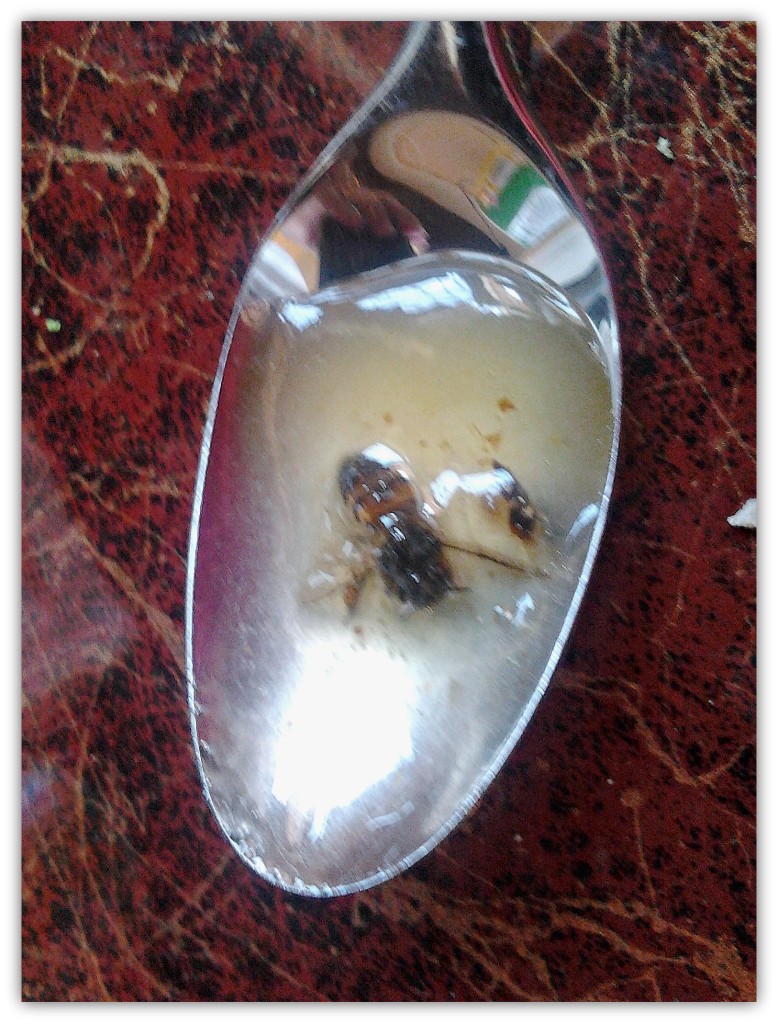
Once I started making granola on a regular basis in Uzbekistan, I became a frequent customer on the honey aisle in our local bazar. Vendors there had honeys collected from various parts of Uzbekistan and other countries in the region. Last year I had the great fortune to visit a beekeeper’s association in the Ferghana Valley where I purchased a liter of honey directly from the beekeeper and found this little guy when I opened the jar:

Bee spoon

I haven’t encountered any stowaways in my local Good Flow honey yet, but there’s a first time for everything!

This recipe is what I’d call a base recipe–it’s one you can build on and modify with any mix-ins you like. To prevent any nuts and dried fruits from burning I add them all at the end, after the granola comes out of the oven. It’s hard to say how many servings this makes–that all depends on how many mix-ins you add to the base recipe.

Finally, I’ve recently started making the granola with coconut oil. I haven’t tried a blend of oils, but I suspect it would work pretty well. My only hesitation in using 100% coconut oil is the expense, but it is super delicious and so far it’s been worth it. If you’re gluten-free and can eat oats, just be certain to use certified gluten-free oats.

Honey-Flax Granola

6 cups rolled oats
1/2 cup oil
1/2 cup honey
1/4 cup ground flax meal
Ground cinnamon and ginger to taste
Pinch salt
Mix-ins of your choice (I usually add about 1 cup total of nuts and fruits, and toasted seeds and coconut would work well)

Preheat the oven to 350 degrees. Line a half-sheet pan or two cookie sheets with sides with foil or a silicone baking mat. Spread the oats evenly over the baking sheet. Bake for 15 to 20 minutes until lightly toasted, stirring 2-3 times while baking. Remove oats from oven and reduce heat to 325 degrees.

Combine oil and honey and heat until bubbly. Carefully pour oats into a large, heat-resistant mixing bowl, reserving baking sheets. Pour oil/honey mixture over the oats and mix until the oil and honey are absorbed. Add the flax meal, salt, and a generous sprinkle of cinnamon and/or ginger. Stir to combine and taste to adjust seasoning. Return the mixture to the reserved baking sheets.

Continue baking at 325 degrees for 15-20 minutes longer. Remember to stir every 5-7 minutes to prevent uneven baking, taking care to make sure the edges don’t burn. When nicely toasted, place in a large bowl and the mix-ins. Let the mixture cool and then store in an airtight container.

NOTE: This recipe will go from just perfect to overdone in a flash. Be very vigilant in the last 5-7 minutes of baking to make sure it doesn’t burn.

Honey-Pecan Granola

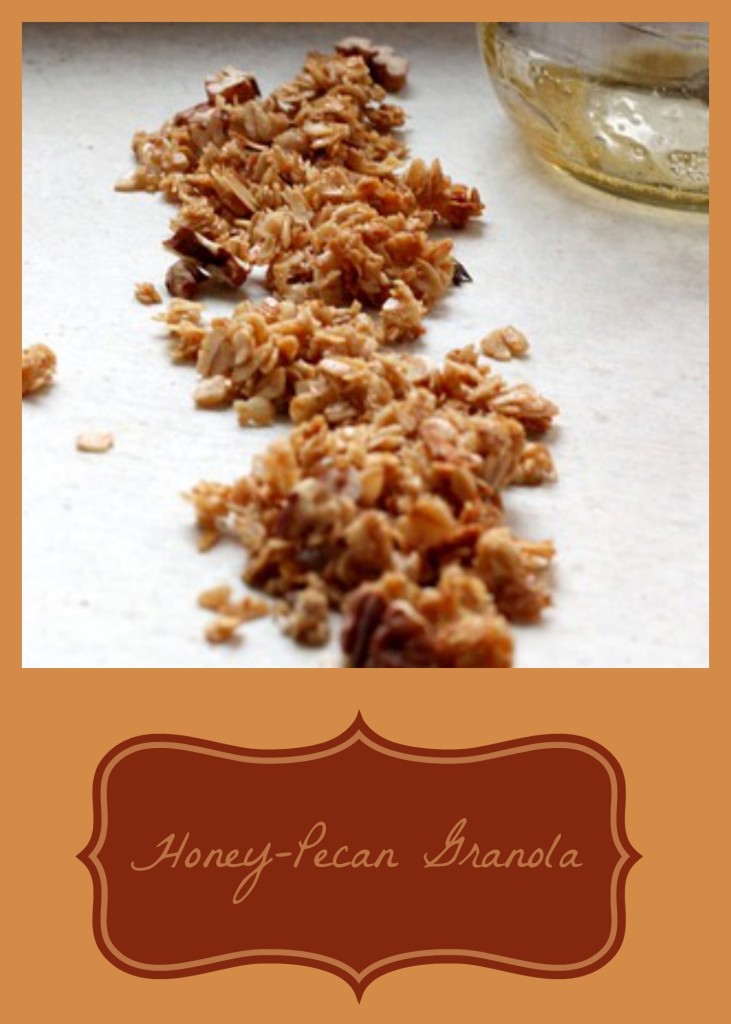
Honey Pecan granolaOr honey-almond granola. Or honey-coconut granola. Or honey-cranberry granola. Or honey-flax granola. Basically, you can add almost anything (and everything) you like and this granola is divine.

I won’t post the recipe right now, but I’ll add it in the next few days, so you’ll just have to come back.

I made this granola all the time while we were in Uzbekistan because the ingredients were plentiful and relatively affordable. While pecans aren’t locally available there, walnuts, almonds, and pistachios are widely available (though pricey), and they frequently found their way into the mix. Dried apricots, too, were common additions. And the honey. Oh, the honey. More on that to come.

When I originally found this recipe I was looking for a Passover-friendly granola recipe since most breakfast cereals aren’t permitted during the holiday. For several years I only made it at Passover, and then one day I realized I could make an everyday granola using the same principles and ratios.

More to come when I post the recipe, but my current mix involves gluten-free oats, coconut oil, toasted slivered almonds, dried cranberries, local honey, and flax seed. We just picked up a giant bag of pecans, so I’m already concocting the next combination in my head. You can trust it won’t be pumpkin spice.

Weekend Home Cooking

a lolivierI had hoped to share a gluten-free version of my favorite oatmeal cookies today as part of the Cookie Bites series, but time got away from me and I wasn’t able to test out the recipe with a gluten-free flour blend. I promise a recipe for these in the near future, no matter how experimental it might be.

In the meantime, over the last few days we’ve had some nice home-cooked meals, a welcome change from all the eating out we did last week. Every two weeks we get a large veggie box through our CSA Johnson’s Backyard Garden, and all the vegetable dishes mentioned in this post are full of their produce.

Friday night, before a late evening trip to the new Austin Trader Joe’s (which technically isn’t in the city of Austin, but that’s beside the point) we had:

  • Roasted golden beets with toasted pecans and Provencal vinaigrette over red lettuce
  • Creamy polenta with Grana Padano
  • Rainbow chard sauteed with garlic

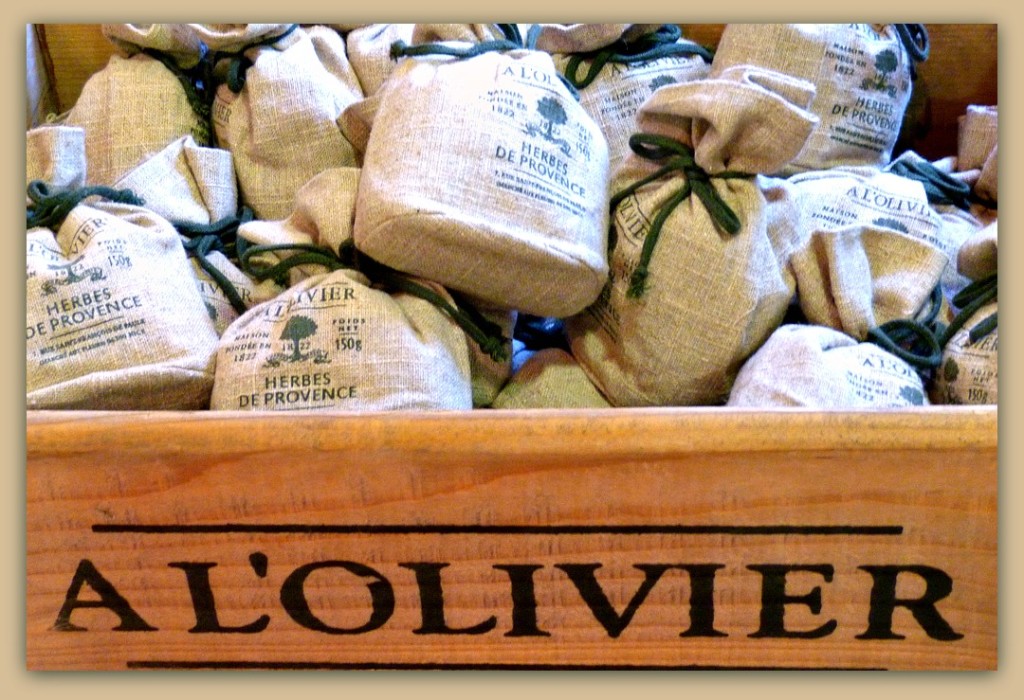
I don’t have a recipe for any of those–I just make them by taste and feel. A big pile of chard? Two cloves of chopped garlic. A pot of polenta for two? A small handful of grated cheese. But my vinaigrette is a pretty traditional combination of balsamic vinegar, olive oil, a drop of dijon mustard, salt and pepper. To make it extra special I substitute a bit of plain olive oil with A L’Olivier’s herbes de provence infused olive oil. It gives an extra lift to the standard vinaigrette recipe.

Saturday we celebrated my sister’s move to Austin with:

  • Roasted chicken with crispy skin
  • Bok choy sauteed with ginger and garlic
  • Soy-glazed sweet potatoes

Both the bok choy and sweet potatoes required soy sauce, and many brands are made with wheat. I use San-J’s gluten-free tamari. This is the brand I’ve used for years, so I was pleased to see that it’s gluten-free, too.

And for a quick Sunday night dinner Paul made black bean tacos with sauteed peppers and onions.

And by the way, if your kohlrabi freezes in the back depth of your refrigerator and then thaws, it will smell horrible. Word to the wise.

Cookie Bites (Part 2)

Cookie CollageToday’s cookie recipe was given to me by a baker friend who took pity on my total lack of gingersnaps while we were living in Uzbekistan (pictured bottom right). Most of the key ingredients for gingersnaps are easily available there, with the exception of molasses, and fortunately we squirreled a couple bottles away when we headed overseas so we could make a few of our favorites.

I love ginger cookies of all sorts. Commercially, Trader Joe’s Triple Ginger Snaps and the old-school Mi-Dels are my faves. Of my own recipes, my favorites are the triple-ginger biscotti I developed about ten years ago. There’s another one I like from an old cookbook, but they tend to bake up chewy rather than crispy. To date, though, I haven’t tried a GF version of either of those recipes.

This recipe from Cook’s Illustrated makes small, crisp snaps not unlike the Mi-Dels and the TJ’s cookies. I’ve since made a gluten-free version of these cookies using Bob’s Red Mill Gluten Free All Purpose Baking Flour. When I made the dough and tasted it, as I usually do with any cookie dough, I was shocked by the bitter flavor. It turns out that the Bob’s blend has a fair amount of garbanzo and sorghum flour in the blend, which have a very strong taste in raw batter, and I was scared that I’d just made something pretty gross. However, once the cookies baked all trace of bitterness disappeared and I ended up with beautiful and spicy crispy gingersnaps.

The list of ingredients is impressive and the baking rotation always confounds me. But they are worth the effort to get the depth and spiciness that makes them such a favorite. Also, about a dozen-and-a-half of these beauties crushed into roasted banana ice cream is amazing.

Cook’s Illustrated Gingersnaps

For the best results use freshly opened packages of dried spices.

2 ½ cups (12 ½ ounces) all-purpose flour
2 teaspoons baking soda
½  teaspoon salt
1 ¼ cups packed (8 ¾ ounces) dark brown sugar
¼ cup molasses
2 tablespoons finely grated fresh ginger
12 tablespoons unsalted butter
2 tablespoons ground ginger
1 teaspoon ground cinnamon
1/4 teaspoon ground cloves
1/4 teaspoon pepper
Pinch cayenne
1 large egg, plus 1 large yolk
½ cup granulated sugar

Whisk flour, baking soda, and salt together in bowl. Place brown sugar, molasses, and fresh ginger in second bowl. Heat butter in 10-inch skillet over medium heat until melted. Lower heat to medium-low and continue to cook, swirling pan frequently, until foaming subsides and butter is just beginning to brown, about 2 minutes. Remove from heat and whisk in ground ginger, cinnamon, cloves, black pepper, and cayenne. Cool slightly, about 2 minutes. Add butter mixture to bowl with brown sugar and whisk to combine. Add egg and egg yolk add whisk to combine. Add flour mixture and stir until just combined. Cover dough tightly with plastic wrap and refrigerate until firm, about 1 hour. (Dough can be refrigerated for up to two days, or frozen for up to a month.)

Adjust oven racks to upper-middle and lower-middle positions and heat oven to 300 degrees. Line two baking sheets with parchment paper. Place granulated sugar in shallow baking dish or pie plate. Divide dough into heaping teaspoon portions; roll dough into balls. Working in batches of 10, roll balls in sugar to coat. Evenly space dough balls on prepared baking sheets, 20 dough balls per sheet.

Place one sheet on upper rack and bake for 15 minutes. After 15 minutes, transfer partially baked top sheet to lower rack, rotating 180 degrees, and place second sheet of cookies on upper rack. Continue to bake until lower tray of cookies just begin to darken around edges, 10 to 12 minutes longer. Remove lower sheet of cookies and shift upper sheet to lower rack and continue to bake until beginning to darken around edges, 15 to 17 minutes. Slide baked cookies, still on parchment, to wire rack and cool completely. Cool baking sheets slightly and repeat step 3 with remaining dough balls.

Yield: 80 1 ½-inch cookies
Cookie Bites (Part 1)

Cookie CollageOver the next couple of days I’m going to share some awesome cookie recipes, starting with my all-time number one favorite cookie in the world.

In 1998 I moved to San Antonio and became addicted to Central Market‘s Chocolate Crispy Cookies. For nine months I bought one package of six cookies for $4.99 each week. I was working at the McNay Art Museum as a graduate intern and my tiny stipend meant that my splurges had to be modest and meaningful. Since I ate every meal at home and took my lunch to work most days, my chocolate crispy cookies were a guilty pleasure and indulgence.

After my internship ended I moved back to California and left the chocolate crispy cookies behind. I missed them terribly and every so often I would try to suss out the secrets of the gooey inside, the crispy outside, and the rich chocolate flavor. I usually ended up with some version of a chocolate-chocolate chip cookie or a brownie bite. The cookies were fine, but they weren’t my beloved Central Market sweetness.

In 2004 I bought the New York Times Jewish Cookbook in preparation for the upcoming Jewish new year, Rosh Hashana. As I sat on the sofa leafing through the book, admiring the depth and breadth of the recipes, my heart started pounding when I saw it: Chocolate Chewies. The recipe was contributed by Joan Nathan, one of the grand dames of Jewish cuisine, and adapted from the cookbook Gottlieb’s Bakery–100 Years of Recipes. I knew immediately that this was the recipe. With only 4 (or 5, depending on if you use the flour) ingredients, it remains a mystery how they can be so tremendously delicious.

You can double this recipe, but since these cookies are very susceptible to drying out so I prefer to make the small batch unless I know I’m baking for a crowd.

Chocolate Chewies (or Chocolate Crispy Cookies)

3 c. powdered sugar
1/2 c. good quality unsweetened cocoa
2 Tbsp. flour
3 egg whites
2 c. chopped pecans

Heat oven to 350 degrees, and line two cookie sheets with parchment paper.

Place sugar, cocoa and flour in bowl of an electric mixer, and beat until well blended. Beat in egg whites one at a time, scraping bowl as necessary. Beat at high speed for 1 minute. Stir in pecans.

Drop heaping tablespoons onto cookie sheets, leaving 2 inches between cookies. Bake 15 minutes on center rack, turning sheet halfway through baking time. Remove from oven. Cool, then peel cookies off parchment.

Store in airtight container or freeze.

Yield: approximately 10-12 cookies

As printed in the New York Times Jewish Cookbook

Where to Eat–Early October Edition

Where to Eat Austin 102013This last week has been super busy and as a result we’ve eaten out a bit more often than usual. While I normally love trying new places, this gluten-free thing means I have to do a fair bit of research before heading out for a meal. I’m starting to learn (and remember) which restaurants have gluten-free menus and a heightened awareness of the needs of diners with gluten intolerance or celiac.

Maudie’s Tex-Mex

ATX Gluten-Free has been a good resource for GF friendly restaurants, and that’s where I learned that Maudie’s has a special gluten-free menu. Maudie’s has long been a favorite of mine–we used to go there about once a week, either after my Jazzercise (don’t laugh!) class on Thursdays or before Paul’s D&D game (okay, laugh!) on Fridays.

While my usual favorite isn’t on this menu because a flour tortilla is involved, pretty much everything else I like in on it. By which I mean chips and queso. Okay, I do like more than that, but chips and queso is a requirement. I think nearly all of their sauces are GF, including the chili con carne, which I’ve noticed is not GF at all restaurants. The staff are clearly educated about the menu and the needs of diners. My tortillas even came to me marked “gluten-free” on the foil. Good stuff, and glad a favorite can still be standby.

Tärka Indian Kitchen

Tärka is one of the newer places near our neighborhood, and it’s affiliated with one of our favorite “grown-up” restaurants, Clay Pit. They also have a special gluten-free menu that offers a huge number of their usual dishes.

Our go-to dishes are almost always channa masala and saag paneer. And let’s talk about pakoras, because I’ve been missing fried stuff a lot and pakoras dipped in chutney are so crispy and salty and spicy and delicious. Again, the staff are knowledgeable about the gluten-free menu and make sure that gluten things are packed separately from the GF dishes.

East Side Pies

Pizza is another thing I’ve been missing, and I’ve woken in a cold sweat having nightmares about the loss of pizza from my life. Maybe not really, but it’s been close. I’m writing about East Side Pies this time for two reasons: I literally just discovered them this week, and their GF pizza is affordable. There’s another nice GF pizza I’ve tried, Via 313, but it’s cost-prohibitive on a regular basis.

You may think I’ve been living under a rock. I haven’t, but I was living in Uzbekistan, so I deserve a bit of a pass for not being on the East Side bandwagon until now. East Side is known for their large thin-crust slices and creative toppings, including special sauces such as spinach curry and hummus. They use tons of produce from local farms, including our CSA Johnson’s Backyard Garden. But back to the gluten-freeness of it all. East Side gets its crusts from a local company called Smart Flour Foods and I was happily surprised by the texture, flavor, and quality. It’s a thin crust and it bakes up very crispy. As GF bread products go, this one uses mostly whole-grain flours, so it’s a more nutritious alternative than many GF products. The crusts are available in a few local markets, so I’ll be looking for them. Can’t wait to try some grilled pizzas on these!

Do you like this feature? Let me know if I should keep it up periodically!

Mad Fauxtoshop Skillz

Last weekend I was lucky enough to win free admission to the Austin Food Blogger Alliance‘s Photocamp thanks to Mad Betty, who ran a drawing on her site. I learned a few new skills that I’ve been trying to put into practice over the last several days, skills I now call fauxtoshopping. I think that term usually means spotting or making obvious fakes. In my case it means using easy-to-understand apps to edit photos and create collages for this here blog.

Cupcake Snapseed Collage

What, pray tell, does this have to do with anything gluten-free? The workshop organizers were pretty thoughtful when it came to the special diets crowd, and during the morning break we were treated to tea from Zhi and these amazing vegan and gluten-free cupcakes from Better Bites Bakery. I had a good chat with them about their flour blends and look forward to getting more information to help me hack my favorite recipes over the next month.

I have to say that Melissa Skorpil‘s sessions were amazing. She is a fabulous teacher and I learned so much from her about how to set up a photo shoot. My kitchen is somewhat dark and my over-cabinet lighting is fluorescent, so all my photos turn out green. Now I know how to fix that!

Jane Ko‘s session focused largely on iPhone-ography, but as an Android user I still found some good tools and apps. My photos above of Better Bites’ delicious chocolate-mocha cupcakes started with my phone’s regular cam set for HDR. This “one weird tip” for phone photography is a great one. The photo starts out in richer tones than a regular pic on Auto or similar. I then used the Snapseed app (on iPhone and Android) to crop and edit just about everything from color correction to contrast to brightness.

So after fauxtoshopping it’s time to collage. I have never used Photoshop, and try as I did to follow along in Mary Helen‘s session, I found myself gravitating back to my old favorite, Picmonkey. Smartly, she showed the analogues in Lightroom and Picmonkey for just about every feature she showed in Photoshop. I had NO idea how much Picmonkey could do, and I’ve since sprung for the full version, which costs about $36 a year.

So back to those gluten-free cupcakes. They were divine. They weren’t divine for gluten-free. They were just straight up damn good chocolate cupcakes. I am pretty picky about frosting, so I had to try the grasshopper ones, too, and they were even better. This is what gets me excited about this new foodstyle–finding truly delicious foods that fill a niche in my new diet.

Because everyone needs cupcakes.

Sunday Brunch at The Steeping Room

Sunday brunch at The Steeping Room

Sunday we met up with with our longtime friends Mitch and Donna and their darling two-year old Zella. It was great fun to hang out and catch up after a few busy months of not seeing each other. Zella brought her giraffe mask and we played a bit of peekaboo. Only later did I realize I’d been holding the mask upside-down so the giraffe horns were more like fangs. Oops.

Austin is booming with restaurants, and our neighborhood scene exploded in the three years we were away. I’ve nearly had accidents rubbernecking all the new businesses on the main road in our ‘hood, and they just keep coming. We decided to meet at the new-to-us nearby location of The Steeping Room, a place that’s quickly becoming a go-to staple. When The Steeping Room first opened in another part of town it was a wonderful addition with its offerings of scores of tea blends, traditional tea service, and a varied menu with choices from healthy to decadent. Now that it’s closer to our house I suspect we’ll be there with even greater frequency.

One of the reasons I love this place is because the menu is easy to navigate for people with dietary restrictions. I wrote a bit yesterday about the mentality of living without, and what I enjoy about restaurants like The Steeping Room is how they use more than the average amount of kitchen creativity to create beautiful meals that are delicious whether they are meat, vegetarian, or dairy or gluten-free.

While we waited for our friends to arrive, Paul and I started with spiced apricot scones served with jam, fig and port compounded butter, and clotted cream. I’m just starting to learn my way around gluten-free baked goods, and while the flavor of the scones was excellent, they were very crumbly, making it tough to spread the delicious spreads. We made do and polished them off. Paired with a pot of strong Earl Grey, it was a perfect start to our Sunday morning.

On Donna’s recommendation I got the latkes and gravlax, served with sour cream and berry gastrique. Sounds very fancy, and it looks pretty fancy, but it was super comfort food on a drizzly and chilly (by Texas standards, anyway) late September morning. As I sit here I’m thinking about how easy it would be to make a similar dish at home, though I’m not quite sure I’ll replicate the jasmine tea-cured gravlax.

When we eat tempting and delightful foods like this I don’t feel like I’m living without. I feel happy and lucky to have so many fabulous options just down the street.

Day One: E&W Goes Gluten-Free

31 days buttonI haven’t talked about it here yet, but about a month ago I had to change my diet because of a health condition and begin eating gluten-free. In some ways it has been a radical shift, and in other ways it’s not noticeable at all.

My friend Kelsey, who blogs at Heart Knit Home, encouraged me to join the 31 Days Of… blog challenge, and after some hesitation I agreed. I don’t blog here terribly often, but I always have intentions of doing more. This seemed like a good way to get in the habit of writing here more frequently while also sharing some of the exploration I’m doing into this new way of eating. I also want to give a shout out to Kelly and Angela who helped me get my lovely button and banner for this challenge.

I try very hard not to think of this foodstyle as having to live without something. That negative spin on it gives me pause. Instead I’m just trying to embrace the difference. While I don’t miss bread too much, especially since there are some good gluten-free option, I do miss being able to eat foods at restaurants that should be safe, but because of cross-contamination of cooking oil they aren’t.

The foods I’m referring to are french fries. And tortilla chips. But mostly french fries. Sigh.

Excuse me while I go saute some potato wedges in schmaltz, mmmkay?

Marcella Hazan is Dead

Goodbye, Marcella

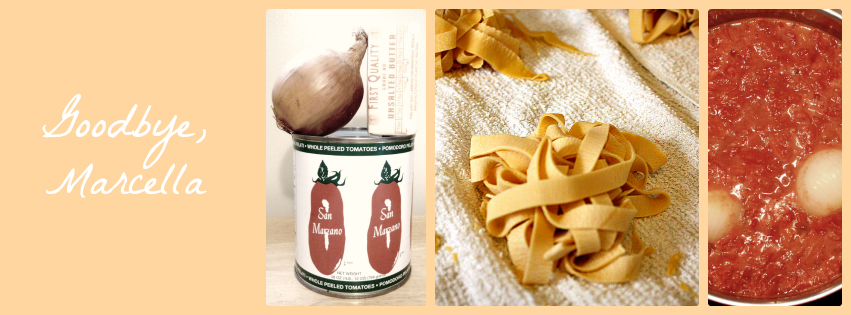
I was working all day, building a site for a wonderful event in San Diego called Cake Bake, and I missed the news earlier in the day that Marcella Hazan passed away today at the age of 89. Hazan was a force in the kitchen, and her influence on Italian cuisine in America is impossible to overstate. Her lasting influence in my kitchen will her Tomato-Butter Sauce, another of my so-called best recipes. I didn’t know Mrs. Hazan, but if you can know a person through her perfect recipes, then I suspect she was uncomplicated on the surface and delightfully complex inside.

I’m embarrassed to admit that I only started making this sauce about two years ago. We had huge #10 cans of tomatoes in our cupboard, and with only two of us I worked hard to find new ways to use them after I’d exhausted some of our traditional repertoire. A good, dependable tomato sauce had always eluded me. Mine always came out strangely sweet or bitter, and I struggled with whether I should make a quick-cook sauce or do a day-long simmer. At its best my sauce was slightly worse than an average store-bought marinara.

Where I first found the recipe I’m not sure. Most certainly it was on a blog, possibly on Smitten Kitchen. But once turned on to it, I couldn’t seem to get away from it–Hazan’s Tomato-Butter Sauce kept popping up everywhere. Mention-itis, as Bridget Jones would say. Was it possible that this sauce of beautiful simplicity had been right under my nose for years, but I’d overlooked it?

Last winter, when there wasn’t an abundant variety of vegetables available in Tashkent, we slowly worked our way through about ten of those #10 cans, making a pot of sauce each week. I had planned to make some today, but the day got away from me. It would have been a fitting eulogy.

Marcella Hazan’s Tomato Sauce with Butter and Onion

28-ounce can peeled plum tomatoes, no salt or herbs added
5 tablespoons unsalted butter
1 small white onion, peeled and cut in half
Kosher salt

Add the tomatoes, butter, onion halves, and a pinch of salt to a 4-quart saucepan. Bring to a simmer over medium-high heat, then lower the heat. Crush the tomatoes lightly with the back of a spoon as they cook, and stir occasionally. Simmer very gently for 45 minutes, until much of the liquid reduces and the butter droplets separate from the tomatoes. Remove and discard the onion.

According to Giuliano Hazan’s version of his mother’s recipe, “The sauce is done when the butter has separated from the tomatoes and there is no remaining liquid.”

Serve over hot pasta with Parmesan, if desired.

Note: this sauce freezes beautifully, but making a double batch takes much longer than 45 minutes, based on my experience. Also, you don’t have to discard the onion. I think it’s delicious, so I usually save it and separate off a few rings to nibble on while finishing dinner.